No Time For Flash Cards
preschool activities, preschool crafts, and preschool books.
For Teachers
Toddlers
Preschool
Kindergarten
Elementary
Alphabet For Starters
Select another category
25 Classic Crafts
31 Winter Break Activities
40 Bedtime Books
4th of July
5 minute sparklers
5 senses
50 Alphabet Activities
50 Alphabet Books
50 books for 2 year olds
50 Easy Art Projects For Toddlers
50 Outdoor Activities
75 activities for 3 year olds
75 Books That Build Character
75 Christmas Books For Kids
75 Things To Add To Playdough
75 TV free Activities
99 TV FREE activities for summer
A Month Of Giving
Acorn
Acorns
action songs
Activities For 1 year olds
Activities For 3 Year Olds
Advent Calendar
African Crafts
Age Preschool
Age: Elementary
Age: Infant
Age: Kindergarten
Age: Toddlers
Airplanes
Alien
All about me
All About Me Books
Alligator
Alliteration
Alphabet activities
Alphabet Books
Alphabet Crafts eBook
Alphabet For Starters
Alphabet Garden
Alphabet Peg Dolls
Alphabet Place Mat
Angel
Angry Birds
Animal Activities
Animal Babies
Animal Tracks
Ant
Anti-Racist Education
Apple Prints
Apple Tree
Apples
Aquarium
Arbor Day Crafts
Archery
Arctic
art activity
Art Museum
art projects
Art Storage
Art Supplies
Artful Parent
Artist Inspired Lessons
Astronauts
At Home Activities
Australian Animal Activities
Author Showcase
Author Showcase : Lois Lenski
Autumn Books
Awards
Babies and Toddlers
Baby Animals
Back to Basics
Back to School Books
Back-to-School
Backyard Bug Adventure
Baking
Baking with Toddlers
Ball Painting
Ballet
Bandage Lightning Bugs
Bandaid Art
Banjo
Banned Children’s Books
Barnyard
Baseball
Basics For Beginners
Basketball
Bat
Bath Poof Painting
Bath Toys
Batman
Beach
Beading
Beard
Bed Time Books
Bees
Beginners
Behavior Management
Best Board Books
Best Books A-Z
Best Of
Best Of 2010
Big Pumpkin
Big Red Barn
Binoculars
Bird bath
Bird Feeder
Birds
Birthday
Black Friday Deal
Black History Month
Blending
Blocks
BlogHer
Blow painting
Board Books
Board Books For Babies
Boats
Book Activities
Book Bag
Book Tournament Bracket
Bookmark
Books About “Issues”
Books About Adversity
Books About America
Books About Animals
Books About Anxiety / Worrying
Books About Apples
Books About Babies
Books About Ballet and Dancing
books about baseball
Books About Basic Concepts
Books About Bears
Books About Bedtime
Books About Being Different
Books About Biographies
Books About Brave Girls & Women
Books About Bugs
Books About Bunnies
Books About Camping
Books about cancer
Books About Cars & Trucks
Books About Cats
Books About China & Chinese New Year
Books About Christmas
Books About Christmas – Diverse
Books About Christmas without Santa
Books About Colors
Books About Community Helpers
Books About Construction Vehicles
Books About Cowboys/Cowgirls
Books About Dads
Books About Death
Books About Dinosaurs
Books About Divorce
Books About Dogs
Books About Earth Day
Books About Easter
Books About Elections & Presidents
Books About Emergency Vehicles
Books About Fairy Tales
Books About Fall
Books About Fall Leaves
Books About Families
Books About Farm Animals
Books About Feelings
Books About Fine Art
Books About Fire Trucks
Books About Flowers
Books about food
Books About Friendship
Books About Frogs
Books About Gardening
Books About Gardens
Books About Geography
Books About Goldilocks and the Three Bears
Books About Halloween
Books About Hanukkah
Books About Immigration
Books About Inclusion
Books About Japanese Internment
Books About Knights
Books About Lego
Books About Love
Books About Math
books about mom
Books About Monsters
Books About Moving
Books About Music
Books About Nightime
Books About Penguins
Books About Pets
Books About Polar Bears
Books About Potty Training
Books About Poverty
Books About Princesses
Books About Pumpkins
Books About Reading
Books About Robots
Books About Santa
Books About School
Books About Sea Animals
Books About Shapes
Books About Snow
Books About Snowmen
Books About Social Justice
Books About Space
Books About Spring
Books About STEM
Books About Strong Girls
Books About Superheroes
Books About Thanksgiving
Books About The Beach
Books About The Human Body
Books About The USA
Books About The World
Books About The Zoo
Books About Tough Stuff
Books About Trips (Travel)
Books About Trucks
Books About Unicorns
Books About Valentine’s Day
Books About Weather
Books About Winter
Books About Women Who Changed History
Books by Canadian Authors
Books For Boys
Books For Field Trips
Books For Girls
Books For Kindergarten
Books for Preschool
Books I’d Save In A Fire
Books In Spanish
Books People Hate
Books That Celebrate Black Boys
Books That Help Kids Through Transitions
Books That Make Kids Laugh
Books That Rhyme
Books That Teach Children to Include Others
Books That Teach Important Lessons
Books To Read Together
Books With Asian Main Characters
Books with Muslim Characters
Books With South Asian Characters
Boredom Busters
Bowling
Boxes
Boys and Reading
Bracelet
Brown Bear
bubble blowing
Bubble Wand Paintings
Bubble wrap prints
Bubbles
Bugs
Build a Robot
Building
Bulldozer
Bunnies
Bunny Ears
Busy Pages
Butterfly
Button Mosaics
Buttons
Cactus
Caldecott Honors Books
Camp Learn & Play
Camp Mom Summer Activities Pack
Camping
Canada
Canada Day
Canadian Flag
Candy
Candy Canes
Candy Christmas Trees
Candy Corn
Canvas Painting
Car Wash
Cardboard Roll Crafts
Cards
Carnival of Play
Carrie Anne
Carrot
Cars
Castles
cat craft
Cat In The Hat
Cat Puppets
Caterpillar
center activities
Cereal
Chalk
Chalkboard
Chapter Books
Charity
Chica Chica Boom Boom
Chicken
Chicks
Childcare Checklist
Childhood Favorites
Children’s Book Reviews
Children’s Book Week
Chill Family Time
China
Chinese New Year
Chore Chart
Christmas
Christmas Around The World
Christmas Board Books
Christmas Book Activities
Christmas Books
Christmas Bows
Christmas Cookies
Christmas Crafts
Christmas Lights
Christmas Ornaments
Christmas Printables
Christmas Tree
Christmas Wreaths
Chrysanthemum
circle time
Circle Time Activities
Circle time Lesson
City
Classroom Community
Classroom library
Classroom Tips
Clay
Clothespin Turkey
Clothespins
Clouds
Co-operative Projects
Coffee Filter Crafts
Coffee Grounds
Coffee Shop
Collage Shamrock
Collages
Color Hunt
Color Matching
Color mixing
Color recognition
Colored Glue
Colors
Community Activities
Comprehension
Computer
Constellations
Construction
Contributing Writers
Cookies
Cooking
Cork Prints
Corks
Corn
Coronavirus school closure activities
Cotton Ball Clouds
Counting
Counting Books
Cowboys
Crabs
craft kits
Crafts
Crafts & Book Pairs
Crafts From Around The World
Crayola
Crayon Candle
Creativity & Kids
Crunchy Domestic Goddess
Cupcakes
Cursive Handwriting Practice
Cursive Name Bugs
Custom Alphabet Book
Custom Roadway
Cutting Activities
Daisies
David Shannon Books
Daycare Advice
Decoupage
Dentist
Despicable Me 2
Developmentally Appropriate Practice
Dice Games
Differentiation
Dig and Find
Digraphs
Dinosaurs
Dirt
Discovery Bottles
Discovery Boxes
Distance learning for preschool
Diverse Books
Diverse Books For Toddlers
Diversity
DIY Name Stamps
DIY Postcards
DIY Scratch Off Paint
DIY Water Table
Dog Collar
Dollar Store
Dominoes
Dragonfly
Dragons
Dramatic Play
Drawing
Dreams
Dried Lentil Art
Driveway Graffiti
Dry Erase
Duck Duck Fish Art
Duck on a bike
Ducks
Duplo
Dying Easter Eggs
Early Literacy
Early Literacy Resources
Earth Day
Easel Activities
Easter
Easter Egg Collages
Easter Eggs
Easter Magnets
Easy Hair Bow
Egg Carton Crafts
Egg Carton Number Match
Egg Toss
Eggs
Elections
Elephants
Emergent Curriculum
Emily Carr
Emotions
Engineering
Eric Carle Books
Estimating
Everyday Preschool Book
Exploring Water
Eye Spy
Eye Spy Bag
Fairy
Fairy House
Fairy Tales
Fairytales
Fall Activities
Fall Crafts
families
Family Activities
family field trips
Family Photo Quilt
Family Puppets
Family Tree
FAQ
Farm
Farm Animals
Father’s Day
Father’s Day books
Father’s Day Card
Feather Painting
Feathers
Feelings and Emotions
Felt
Felt Egg
Felt Flower
Felt Food
Felt Mustaches
Feminist Book List
Field Trips
Fine Art
Fine Motor Activities
finger paint recipe
Finger Painting
finger plays
Fingerplays
Fire Safety
Fire Truck
Fireworks
Fish
Fish Bowl
Fish F
Fishing Game
Five Senses
Flag Day
Flag Day Crafts
Flags
Floam
Flower
Flower art
Fly Swatter Painting
Foam Magnets
Foam Stamps
Foam Turkey
Food Activities
Food Books
Football
For Parents
For Teachers
Forest Animals
Fourth of July
Fractions
Frankenstein
Free Art Friday
Free Choice Activities
Free Offer.
French
Friendship
Frog Lifecycle
Frogs
Frozen 2 crafts
Frugal
Frugal Friday
Fruit
Full List Letters of the week #1
Fun Food For Kids
Fun with Fruit
Funds of Knowledge
games
Garbage Truck
Garden
Garden Sensory Tub
Gardening
Garland
Gas Pump
Geoboard
Geography
Georges Seurat
Ghost
Ghost Cookies
Gift Guides
Gift Guides For Kids
gingerbread activities
Gingerbread Houses
Gingerbread Men
Giraffes
Giraffes Can’t Dance
Giveaway
Glass Bead Magnets
Glow in the dark glue
Gluten Free Playdough
Gnomes
Gold Medals
Goldilocks and the Three Bears
Good Deeds
Good Fairies
Grandma
Grapes
Graphing
gratitude activities
Green Crafts
Grief
Grocery Store
Gross Activities
Gross Motor Activities
Groundhog Day
Growth Chart
Growth Mindset
Guest Post
Guest Posts
Guitar
Habitats
Halloween
Halloween Books
Halloween Circle Time
Halloween Crafts
Halloween Math
Halloween Sensory Tub
Halloween Treats
Hammering
Hand Eye Coordination
Hand made fish
Hand made Wrapping Paper
Hand Print Butterfly
Handprint art
Handprint Crafts
Handwriting
Hanukkah
Hanukkah Activities
Happy Holidays
Harriet Ziefert
Harry Potter
Harvest
Haunted House
Heart
Hedgehog
Herman The Worm
Hexbugs
High Frequency Words
History
Hockey
Holiday Card Holder
Holiday Gift Showcase
Home Art Gallery
Home Depot
Home Made Picture Books
Homemade Gifts
Homemade Paintbrushes
homeschool kindergarten
Homeschool materials
Homeschool Schedule
Hooked On Phonics
Hospital
Hot Dog
House
House for a Hermit Crab
how to homeschool preschool
How to teach a three year old to write
How To Teach Preschool
How to teach preschool remotely
Hug
Human Body
hunt
Ice Activities
If I Built A House Activities
If You Give A Cat A Cupcake
If You Give A Moose A Muffin
If you Give a Mouse a Cookie
In Flanders Fields
Inclusive ECE
Indian Corn
Indoor Activities
Indoor Physical Activities
insects
Inspired by You
Instagram
Interviews
iPad Giveaway
Island
Itsy Bitsy Spider
Itty Bitty Bookworm
Jack and The Beanstalk
Jack-o-lanterns
Jackson Pollock
Japanese Cherry Tree
Jar Lid Stamps
Jasper Johns
Jelly Fish
Jenny’s Light
Jewelry Making
Jingle bells
Journaling
Jungle Animals
Kandinsky
Katy
Kevin Henkes
Keys
Kim
Kindergarten and Up
kindergarten readiness
Kindness
Kindness Rocks
Kissing Hand
Kitchen Art
Kitchen Utensil Prints
Knights
Koala
Lacing Activities
Lacing Card
Ladybugs
Lanterns
Latkes
Lauren Child
Learning About Money
Learning About Peace
Learning After School
Learning through play
Leaves
Left Over Easter Eggs
Lego
Leo Lionni
Leopard
Lesson Plan
Lesson Plans
Letter A
Letter A Theme
Letter B
Letter B Theme
Letter C
Letter C Theme
Letter D
Letter D Theme
Letter E
Letter E Theme
Letter F
Letter F Theme
Letter G
Letter G Theme
Letter H
Letter H Theme
Letter I
Letter I Theme
Letter Identification
Letter J
Letter J Theme
Letter K
Letter K Theme
Letter L
Letter L Theme
Letter M
Letter M Theme
Letter N
Letter N Theme
Letter O
Letter O Theme
Letter of the week
Letter P
Letter P Theme
Letter Q
Letter Q Theme
Letter R
Letter R theme
Letter Recognition
Letter Rubbings
Letter S
Letter S Theme
letter sound matching
Letter Sounds
Letter Stamp Activities
Letter T
Letter T theme
Letter U
Letter U Theme
Letter V
Letter V Theme
Letter W
Letter W Theme
Letter X
Letter X Y Z Theme
Letter Y
Letter Z
Letters & Numbers
LGBT books
Library
Life Cycle
Light Box
Light Table
Lighthouse
Lightning Bugs
Lion
List of Free Art
Literacy Activities
literacy center activities
Lock & Key
Lois Elhert
Long Term Projects
Look what they made
Loose Parts
Love Bugs
low prep activities
Lowercase a
lowercase b
Lowercase c
Lowercase d
lowercase e
Lowercase f
lowercase g
lowercase h
lowercase j
lowercase k
lowercase l
Lowercase Letters
Lowercase m
Lowercase n
Lowercase o
Lowercase p
lowercase r
Lowercase s
lowercase t
Lowercase u
Lowercase w
lowercase y
Lucky Gold Hunt
Lunch break learning
Magic Shape Paintings
Magic Wands
Magnetic Letter Activities
Magnets
Mail Sorting
Mailbox
Make Paper
Make your own crayons
Maker Space
Making Muffins
Manners
Map
Mardi Gras
Maria Dismondy
Marshmallows
Martha Stewart
Martin Luther King Jr. Day
Masks
Matching Activities
math
Math Activities
Math Center Ideas
Math Centers
math mats
Math Printables
Matisse
Mazes
Measurement
Media Macaroni
Melanie Watt
Melissa and Doug
Melted Crayon Crafts
MeMeTales
Memorial Day Crafts
Memory
Mermaid
Mess Free
Mice
mini eraser activities
Mini Olympics
Mining
Mittens
Mo Willems
Mom it Forward
Money
Monkey
Monster
Moon
Moose
Moosetashe
Mother’s Day
Mother’s Day Books
Mouse Shapes
Movement
Ms. Frizzle’s Adventures
Muck
Mud
Muffins
Multi-age Activities
Multicultural Books
Multicultural Crafts
Mummies
Mural
Mushroom Prints
Music
Music Activities
Musical Instruments
Must Haves For Day Camp
Mustache
Name Activities
Naptime Creations
Nativity
Nativity Crafts
Nature Activities
Nature Collages
Nature Jars
Necklaces
Nerf Activities
Nests
New Release Books
New Years
Newspaper Hats
Ninja
Non Fiction Books For Kids
Noodle Art
Notes & News
November Activities
Number Recognition
Numbers
nunchucks
Nursery Rhymes
Nutrition
Ocean Activities
Octopus
Ohana Mama
Olympic Crafts
One To One Correspondence
Onion Printing
Online Safety
Oobleck
Ooops
Open Ended Art
Operation Playtime
Orange Prints
Organization
Outakes
outdoor activities
Outings with kids
Outside activities
Owl Puppet
Owls
Paint Sample Art
Painting
Painting like Pollock
Painting with Gloves
Panda
Paper Bag Crafts
Paper Bag Frog
Paper Bag Puppet
Paper Crowns
Paper Plate Art
Paper plate crafts
Paper Plate Frog
Paper plate Jelly Fish
Paper Plate Sun
Paper plate tortoise
Paper Plate Turkey
Paper Roll Crafts
Parachute
Parent and Tot Projects
Parenting
Parenting Book Club
Pasta Collages
Pasta Dyeing
Pasta Pouring
Patriotic Crafts
Patterning
PBS LearningMedia
Peacock
Peer Scaffolding
Pencil Holder
Pencils
Penguin
Pete The Cat
Pets
Phases of the Moon
Phonics
phonological awareness
Photography
Physics
Picky Eaters
Picture Frames
Pig
Pilgrim Hat Cookies
Pinkalicious
Pinterest
Pirates
Pizza
Place Cards
Place Mats
Planet Earth
Planets
Play
Playdough
Playdough Recipes
Playroom
Pocket Chart Activities
Poetry
Pointillism
Pokemon
Polar Bear Polar Bear What Do You Hear ?
Polar Bears
Pond life activities
Pool Noodle Activities
Popsicle stick coaster
Popsicle stick crafts
Popsicles
Position Words
Positive Princess Books
Post it Notes
Post Office
Pot of Gold
Potato Print Turkey
Potato Prints
Potty Training
PPD
Preschool Activities
preschool activities at home
Preschool Around The World
Preschool Behavior
Preschool Book Lists
Preschool Crafts
Preschool Curriculum
Preschool Lesson Plans
preschool songs
Preschoolers
President’s Day
Pretend Play
Pretend Play Toy Store
Pride Book List
Princess
Print referencing
Printables
Process art
Product Review
Professional Development
Puffy Paint
Puffy Paint Clouds
Pumpkin
Pumpkin Luminaries
Pumpkin Printing
Puppets
Purplicious
Puzzles
Q tip dandelion
Q tip painting
Quarantine Activities
Quick Activities
Quiet Time Ideas
Quilt
Racism in Children’s Books
Raffi
Rain
Rainbow
Rainbow Gelatin Sensory Tub
Rainy Day Rainbow- Recycled Art Project
Read & Make
Read Across America
Read Across America without Dr. Seuss
Reader Survey
Reader’s Corner
Readers Q&A
Reading
Reading Nook
Reading Readiness
Ready For School
Recycle Town
Recycled Art
Recycled Crafts
Recycled Crayons
Recycled Rocket
Recycled Round Up
Recycled Sail Boat
Recycled UFO
Recycling
Reindeer
Rememberance Day
Remembrance Day
Remote Lesson PLans For Preschool
Resilience
Reviews
Rex Wrecks It Lesson Plan
Rhyming
Ribbon Painting
Roadway
Robert Munsch
Robot
Robot Costumes
Rock Bugs
Rock Crafts
Rock Painting
Rockets
Roll & Cover Games
Round Up
Rubber Duck Stamping
Rudolf
Safari
Salad Spinner Art
Salt Art
Salt Map
Salt Scrub
Sand Art
Sandpaper Activities
Sandra Boynton
Santa
Santa’s Workshop
Scarecrow
Scavenger Hunts
School Bus
School of Fish
Science
Science Experiments
Scissor Skills
Scrap Paper Art
Scrubber Painting
Sea Animals
Sea Urchin
Seahorse
Season Sort
Seeds
Self Care for Teachers
Self Portraits
Sense of Hearing
Sense of Sight
Sense of Smell
Sense of Taste
Sense of Touch
Sensory Activities
Sensory Bottles
Sensory Tubs
Sent In By You
Series For Young Readers
Setting The Stage for Rock-Star Readers
Sewing
Shake Painting
Shake your sillies out
Shamrocks
Shape 4 Leaf Clover
Shape Activities
Shape Art
Shape Bulldozer
Shape Fire Truck
Shape Sorting
Shape Turkey
Shape-o-saurus
Shapes
Sharks
Shaving Cream
Sheep
Shells
Sheriff’s Vest
Shoe deodorizers
Shooting Star
Shrinky Dinks
Sidewalk Chalk
Sight Word Bingo
Sight word game
Sight Words
Simple Sensory Tub
Simple Summer Crafts
Skeleton
skip counting
Skull
Sleep
Slime
Small group activities
Snail
Snakes
Snapfish
Snow
Snow Globe Snowman
Snowflakes
Snowman
Snowman Blocks
Snowman Song
Snuggle Puppy
Social Distancing
social emotional learning
Songs
Songs For Preschool
Sorting
Sorting Hat
Sounds
Soup
Space
Spanish
Special Needs
Spelling
Spider Cookies
Spiders
Spin Art
Spiner Games
Sponge Painting
Sponsored
Sports Theme
Spring
Spring Crafts
Spring songs for preschool
Squeeze Painting
Squirrel
St.Patrick’s Day
Stamp Making
Stamping
Star Sponge Painting
Star Wars
Starfish
Stars
Stellaluna
STEM
STEM Activity
Stencil
Stick Sculptures
Sticker Zoo
Stickers
Sticky Table
Sticky Wall
Stocking Stuffers
Stockings
Storytelling
Strawberry
Street Signs
Stumpkin craft
Style Guide for Teachers
Subitizing
Submarines
Subtraction
Summer Activities
Summer Activity Plans
Summer Camp
Summer Camp at home
Summer Olympics Activities
Summer Reading
Summer Reading Calendar
Summer Reading for School Age
Summer STEM Lab
Sun Catchers
Sun Crafts
Sun Prints
Sunday Spotlight
Sunflower
Super Bowl
Super Hero
Super Stars
Superheros
Supplies
Swamp
Sweepstakes
syllables
T-Shirt
Tadpole
Tambourines
Target
Tea Party
Teacher Appreciation
Teacher Clothes
Teacher Must Haves
Teaching Kids About Empathy
Teaching Remotely
Teaching Your Child To Write
teachmama
Tegu Blocks
Ten Frames
Ten On The Sled
Terrific Traffic Lights
Texture Activities
Texture Board
Texture Collage
Texture Easter Egg
Texture Letters
Thank You Notes
Thanksgiving
The Mitten Activities
The Olympics
The Very Hungry Caterpillar
Thematic Units
Tiger
Time Outs
Tire Tracks Art
Tissue Paper Collages
Todd Parr
Toddler Activities
Toddler Christmas Crafts
Toddler Circle Time
Toilet Paper Roll Airplane
Toilet Paper Roll Art
Toilet Paper Roll Necklace
Toothbrush painting
Top 10 Books
Train
Transportation
Transportation Books
Trauma
Travel
Travel Craft Box ( supplies)
Tray Activities
Treasure Hunt
Treasure Maps
Tree Craft
Trucks
Turkey
Turkey Baster Painting
Turtles
Tutu
Twisted Tissue Paper Flowers
UFO
Umbrella
Unbreakable Ornament Series
Uncategorized
Uncle Sam
Under the Sea
Unicorns
Unifix Cubes
United States
Unplanned and On The Go
Valentine’s Day
Vase
Vegetable Garden
Vegetables
Veteran’s Day
Video Lesson Plans
Vinegar painting
Virginia Kahl
Visual Discrimination
Volcano
Water
Water Balloons
Watercolor Crayons.
Watermelon
Weather
Weather Books and Crafts
window clings
Window Crayons
Windsock
Wine Cork Stamping
Winter
Winter Books
Winter Break Activities
Winter Crafts
Winter Olympics
Witch
Wonder Woman Books
Woodcut Printing
Word Families
Word Games
Word Search
word wall
Worms
Worms and Snakes
Wreath
Wreaths
Writing Activities
Writing Center
Yarn Easter Egg
You’ve got mail
Zebras
Ziploc Painting
Zoo
Zoom Activities
Zoom Learning
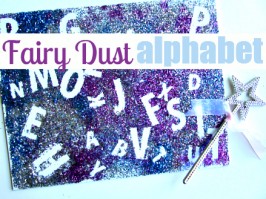
Sparkly Alphabet Craft – Alphabet For Starters
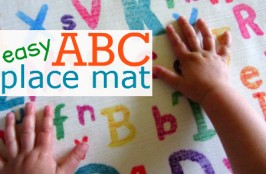
Easy ABC Place Mat – Alphabet For Starters
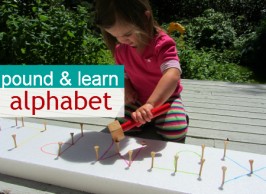
Pound & Learn Alphabet – Alphabet For Starters
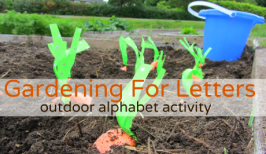
Gardening For Letters – Alphabet For Starters
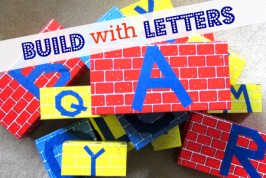
Build With Letters – Alphabet For Starters
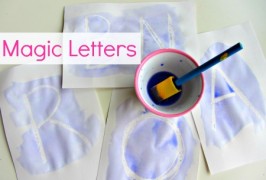
Alphabet For Starters – Magic Letters
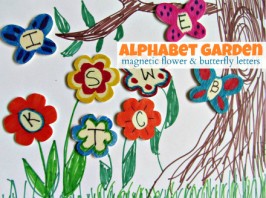
Alphabet Garden – Alphabet For Starters
Alphabet Peg Dolls – Alphabet For Starters
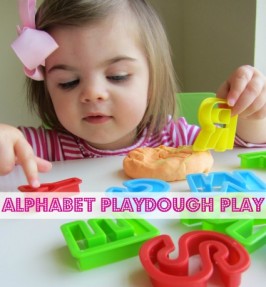
Alphabet Playdough – Alphabet For Starters
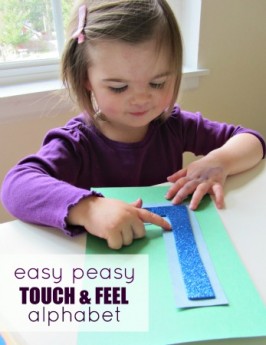
Easy Touch and Feel Alphabet – Alphabet For Starters
Alphabet For Starters- Easter Egg Letters
Previous Page
1
2