No Time For Flash Cards
preschool activities, preschool crafts, and preschool books.
For Teachers
Toddlers
Preschool
Kindergarten
Elementary
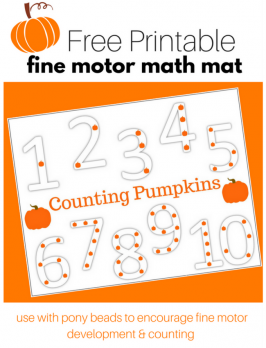
Pumpkin Counting Activity with Free Printable
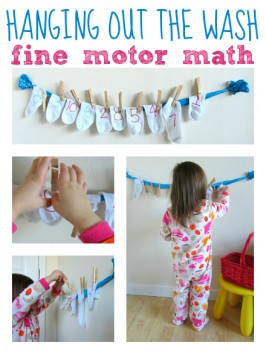
Hanging Out The Wash – Math Activity For Preschool
Easy DIY Number Banner
How Many? Estimating Activity
Peek-A-Boo Learning!
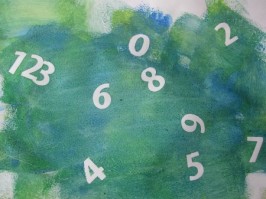
Paint and Peel Math Craft