
When my three-year old woke up the other day, the first thing she did was ask, ” can we do an experiment today?” Seriously.
An “experiment” happens to be three-year-old-code for setting up a concoction station. Also known as magic potion lab. Because this mini-sicence lab activity raises so many questions, engages my child fully, and challenges her curiosity, this is a request that I almost never refuse to fulfill.

The beauty of the magic potion lab is that you can source your pantry and pull out whatever you desire. No special trip to the market is necessary. I don’t know about you, but I am in love with projects that are convenient and low-cost.
The following supply list is what we started with, but feel free to work with what you’ve got.
Supplies
- Water
- Oil
- Vinegar
- Baking Soda
- Liquid Watercolors or Food Coloring
Tools
- Tall Glass Mason Jar
- Spoon
- Pipette or Eye Dropper
- Kitchen Towel

Tip #1: Set this up in the kitchen
We’ve done this in other rooms of the house and even outside, but the kitchen works the best because it’s near a water source, the floors are made to be spilled on, and ingredients are close at hand.
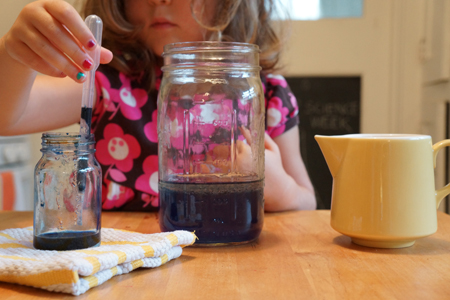
Clear some counter space. Set up all your supplies. In this case we used a tall mason jar, a small jar of liquid watercolors, a small pitcher to fill with water and oil, and a rag for wiping up messes.
I encourage children to do all the work themselves and the little pitcher makes this especially doable.
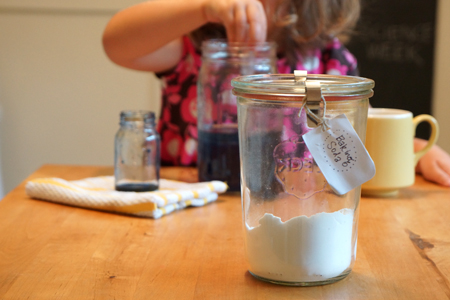
Tip #2: Introduce just a few ingredients at a time
You might feel inclined to offer your child a smorgasbord of ingredients to pick and choose from, but this tends to be overwhelming and it will actually shorten your child’s attention span. A better bet is to introduce just two or three ingredients at a time. This way, your child will learn about the unique properties of those ingredients and understand what happens when they combine.
In the picture (above), we worked with water, oil, and liquid watercolors to explore the phenomena of immiscible liquids (or those liquids that don’t mix, such as water and oil).
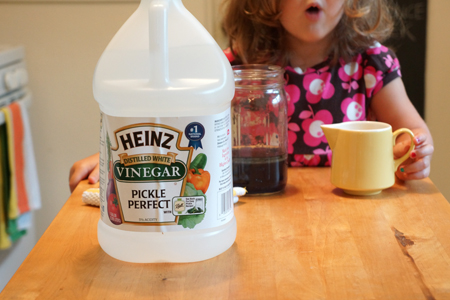
Tip #3: Always keep a supply of baking soda and vinegar in the pantry
When my children or their neighborhood friends ask me if they can make concoctions, they inevitably have baking soda and vinegar explosions in mind. Invest in a gallon-sized bottle of vinegar for just a couple dollars and you’ll keep the alchemy troops happy for a long time.
Two questions for you:
Do you have any tips for setting up a magic potion lab? And what science project has held your child’s attention for longer than you might have expected?
For more creative science experiments that encourage children to think for themselves and develop critical thinking skills, visit us over at Tinkerlab and sign up for the Tinkerlab newsletter.

If you loved this post by Rachelle of TinkerLab you will love other ideas of hers and other bloggers over on our Science For Kids Pinterest board. Check back here tomorrow for even more fun!
Christy says
I’ve done a Halloween themed activity similar to this in the past, where I let the kids be little witches making potions. I’m linking to my blog post about it so if you click on my name it will go direct to that post. We used some of the same things you did, but we added a few other things, such as cream of tartar for a powdered acid, and cabbage juice that changes color in response to ph levels.
Rachelle | Tinkerlab says
Halloween is a great time to bring out a magic potion lab / witch’s cauldron station. Thanks for adding the cream of tartar and cabbage juice (red, I assume) to the mix — super suggestions.
lisa says
My kids love adding sprinkles to all experiments! I found the cheapest way to purchase them it to purchase after a holiday when they are discounted. & at Marshalls/HomeGoods.
How Wee Learn says
Love this idea. My SUPER SIMPLE science experiment is with ice. Pop it in a bowl by itself, a bowl with salt, a bowl of warm water, a bowl of cold water. So easy, no materials, and unusually captivating for my 3 year old!
Tina says
My kiddo loved this when she was younger. I would color the ice cubes with food coloring and it was fun to watch the cool water swirl down to the bottom.
Rachelle | Tinkerlab says
We adore simple science experiments too, and yours is absolutely perfect for the 3-year old crowd. Thank you!
Heather Noel says
Nice! I often have set my daughter up in the kitchen with a mixing bowl, some flour and water and let her go to town; she loves it! Will have to replicate yours.
Sarah says
I love adding dish soap to the vinegar/baking soda concoction. It makes for an extra bubbly “explosion.”
Tina says
Oobleck. My daughter loves to make the stuff and will play with it for an hour or longer. All you need is corn starch and water. And food coloring if you want to get fancy.
Sue-Two Kids Cooking and More says
Kitchen experiments are something my kids loved and now my grandchildren like them too! Thanks for the cool ideas!
Gina says
baking soda and vinegar here too, literally hours have been spent in the pursuit of explosions. I gave my scientists a bowl of flour and sprinkles and plastic dinosaurs once and they were happy for a whole afternoon.
Kim says
I got stuck on the water drop microscope experiment, personally. All you need is a dropper and a green laser pointer. Definitely not for the younger kids due to the dangers that accompany handling lasers, but the awesome show projected on my wall captivated me for hours. Though, some may be surprised at what they find in their water, so attempt at your own risk:)