
I have to confess, as much as I adore Easter, and all thing messy usually, I can’t stand dyeing eggs. There I said it. I don’t know why I dislike it so much, I just do. Instead of hard boiling, we used glitter and foam to make these easy Easter egg magnets!
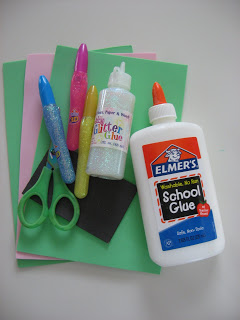
- Gather your materials. You will need some foam sheets, we used 2 colors but use as many as you have or want, some glue, a few colors of glitter glue, scissors, and magnetic tape.
 * word of caution when doing things with magnets and your children. Magnets can be really dangerous if swallowed so I always use these large pieces and make sure they are far too big to fit in a child’s mouth. Even when you think they are over the stick it all in my mouth stage, they will surprise you and it’s not worth the risk.
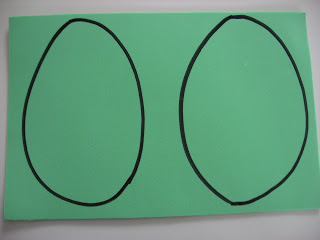
 - Start by drawing an oval or two on a sheet of foam with a marker.
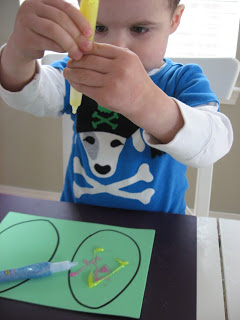
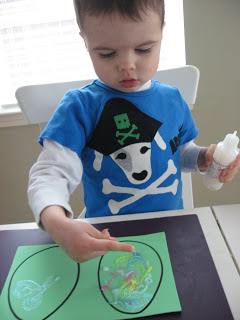
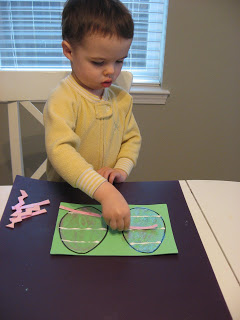
- Have your child use the glitter glue to decorate, they don’t need to be exact or careful. A lot of glitter glue is tough to squeeze but if your child is anything like mine they will insist on doing it themselves.
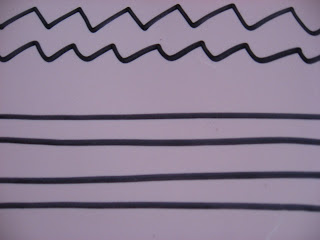
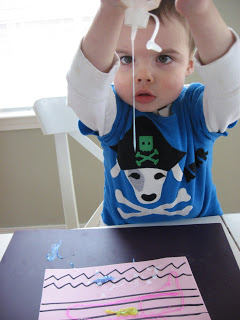
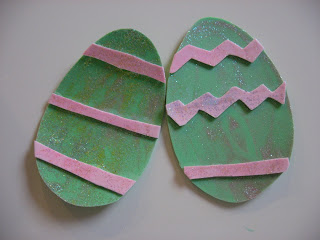
- While they exert their independence and get glitter all over the egg and themselves, draw some lines and zig zags on a second sheet of foam.
- Rub the glitter around to spread it, Not only will this look cool, it cuts the drying time.
- Decorate the 2nd sheet with glitter as well.
- Let the glitter glue dry.
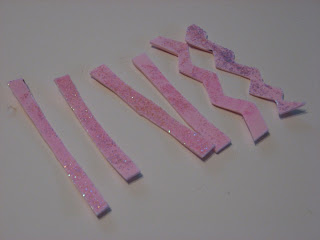
- Cut out the stripes and zig zags.
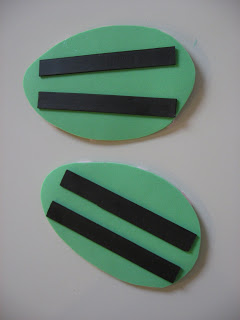
- I added the glue in strips. I asked my son how many he wanted, but did the glue myself.
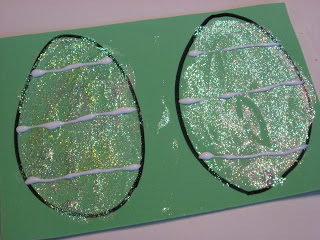
- Add the stripes and zig zags and let dry.
- Cut out the eggs
- Finally, add the magnets.
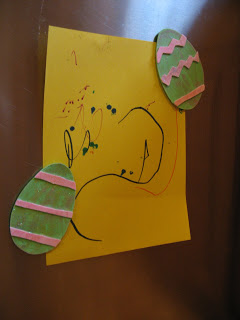
- Use your Easter egg magnets to display your other artwork!


Annette says
I love the concentration he shows while gluing!
Katherine Marie! says
Great fun as always!!! The magnet ideas is fabulous— I have an entire roll of magnet tape I need to start using!
HAPPY EASTER!!!!!!!!!!!!
Rachel@oneprettything.com says
I never get tired of seeing that look of concentration-love it! Great projects this week, I’ll be linking.
Anne says
I was going to say the same thing about your son’s concentration while gluing. I love your blog and visit it regularly. AS a 3 year old preschool teacher, I love seeing a BOY doing so many crafty activities. I have many in my class that never had before coming to my class.
Tara @ Feels like home says
I have a boatload of plastic eggs. Thanks for the great ideas!