 Done baby proofing? Have extra outlet covers ? Turn them into a lesson about emotions with these playdough faces! This activity wasn’t planned at all, I went to the art closet to look for something, saw this unopened box of plug protectors and inspiration struck! We have used Mr.Potato Head pieces for play-dough before but this lets you create your own. It’s a fun way to talk about feelings and conflict in a neutral setting. As you will see further down this activity opened up a few doors of discussion while we played.
- Gather your materials. You will need some flat outlet covers, permanent markers and play-dough. Yes I love the store bought kind.

- Draw eyes on the plug covers with permanent markers. I asked my son to name some emotions and made those. you could also glue on googly eyes.

- Make some fun mouths , can you tell that one is a tongue sticking out? I am no artist!

- Noses – I thought I should tell you what they are just in case you can’t tell .

- Time to play! Oooh wait I should say that I waited a few minutes to make sure the marker was dry.

- He immediately made a grab for the angry eyes .

- When I asked why the guy was angry he said “He’s not angry just serious , he’s a police officer on duty.” I thought that was awesome as some police can look angry but I want my son to always feel like police are not intimidating and this craft let us chat about that and reinforce that police are there to help.

- This is the police man’s wife with a kiss on her cheek . I asked why she has a kiss he told me that husbands kiss their wives when they say thank you for making dinner. I totally wanted to jump in here with a lesson about how at our house that is the case but how cooking isn’t just for wives, but decided the fact that he is at least absorbing that gratitude is shown for every day tasks is good enough for today.


What’s your favorite play dough activity at your house?

Jenae {I Can Teach My Child!} says
What a great idea! We have TONS of outlet covers around here, so this would be so fun. Thanks for the idea!
Laura says
I cannot believe the timeliness of of this activity. I just got done doing feelings “lessons” with my 26 monther and here you are offering another activity I can do with her. awesome. i love how you use things around the house. i also totally agree with your philosophy about the letter of the week. i am new to your blog and want to do everything i’ve seen so far – and i’m picky. you are a natural and your activities are engaging and educational. random question: at what age do you let them start using glue sticks and scissors?
admin says
I was late on glue sticks because my son was very oral and I worried about him biting the stick and chocking, so we still rarely use them opting for plain white glue instead. If your child is not one to pop things in their mouths 2ish is a great time to start with close supervision.
Scissors – start now! Scissor work is so important and such great fine motor practice. You can get no blade scissors to start with ( just plain plastic) and use playdough to cut , make thin snakes and cut them up.
Cerys @rainy day mum says
really great idea – will have to get some covers sent over from the states as the UK ones are triangles due to our plug shapes or could use some large brads with drawings on them from my own craft stash.
Laura@art4littlehands says
Fantastic! I love this idea. Definitely will be using.
Valerie says
So cute! What a great idea – thanks for sharing your creativity.
Sarah Bahm says
I REALLY love this idea!!!!!!!!!!!!!!!!!!!
Angell says
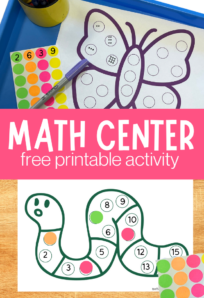
I just love your ideas. I’m not very creative with my own, but I use yours as a base lol. I immediately thought of ways to use this as a Math test. My (homeschooled) son doesn’t handle pressure well so I’m looking for ways to test him without him knowing.
So I have turned your idea into the following:
Write out math equations on separate pieces of small paper. Have a thick, flattened, circular lump of playdoh below each piece of paper. Using the outlet covers, write answers…have kids answer the equation and then find the answers and push plug into mound of playdoh below that equation. (I would write extra answers so he doesn’t figure them about by elimination).
If I really wanted to be creative I can paint them with either dry erase paint or chalkboard paint…then they can be reusable.
Barbara Allisen says
Super! This is a great idea for a MLK day project. We’ll talk about faces and how they are sometimes the same and sometimes different and how faces show emotions. Reading faces is part of relating to others. Good thing I have a whole jar of bottle lids…except I’ve been saving them for 100th day. Thank you for the r & d ( =rob & duplicate 🙂
Elaine Goh says
Thanks for this great idea Allison! I linked back to your inspiration on my post today (http://plantingpeas.wordpress.com/2014/09/20/jesus-heals-bartimaeus-bible-unit-study/).