No Time For Flash Cards

preschool activities, preschool crafts, and preschool books.

  • Blog
  • About
    • Terms Of Use
    • Disclaimer
    • Holiday Gift Guide For Kids
    • Advertise
    • In The Press
  • Contact
  • Privacy
  • Facebook
  • Twitter
  • Instagram
  • Pinterest
  • Bloglovin
  • Preschool Activities
  • crafts for kids
    Preschool Crafts
  • Preschool Books
  • sensory alphabet activity
    Letters & Numbers
  • For Teachers
  • Toddlers
  • Preschool
  • Kindergarten
  • Elementary

March 16, 2011 | 44 Comments

Baby Dress Up – Easy No Sew Tutu!

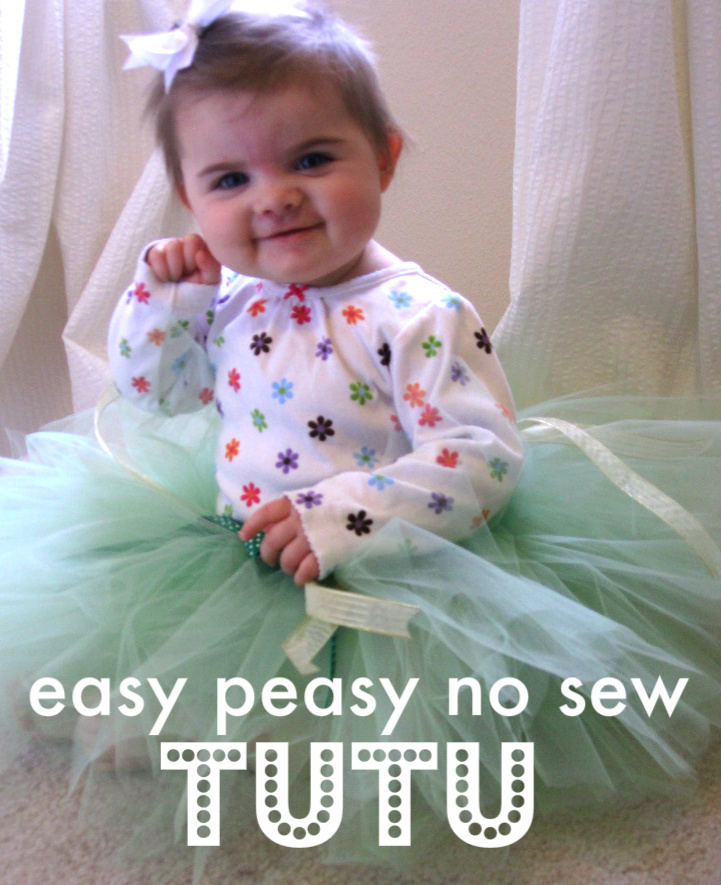
I have made many a tutu in my day, but this is the first for my daughter. There are tutorials all over the place and they may use other methods but this was how I learned years ago and it’s fast , easy and worth sharing.  I love the silly fun frills that come with girls and know that once she can voice her opinion about clothes, hair clips and tutus my reign supreme will be done.  She loved feeling the texture of the tutu but really it’s a fun prop for pictures at this age, in a year or so it will be good for play. The nice thing about these easy tie tutus is that you can add or remove tulle as needed as long as the ribbon is long enough. As with any object with string/rope/ribbon these are NOT to be used unsupervised, slept in or any other activity that isn’t directly supervised.

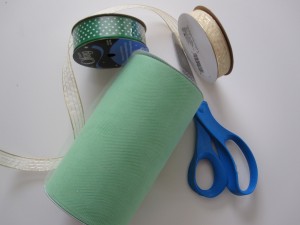
  1. Gather your materials. You will need tulle ( I used a roll of  6″  wedding tulle from Wal-mart), ribbon for the waistband, thinner ribbon for contrast and scissors.
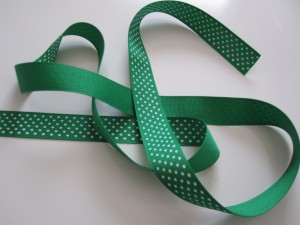
  2. Measure your child’s waist with the ribbon, double it and cut.
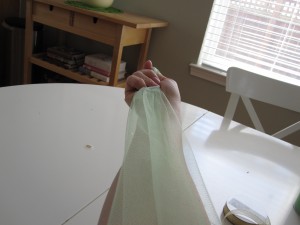
  3. I am not one to measure mostly because I am impatient with everything other than small kids but also because my son turned my yard stick into a lance to go with his Knight’s Shield. So instead I use my arms. For the tulle I did 2 arms lengths and cut. I like longer pieces because once you pop them on the ribbon they will be poofy. Tutus should be poofy!  I did 30 of these. Not all at once.
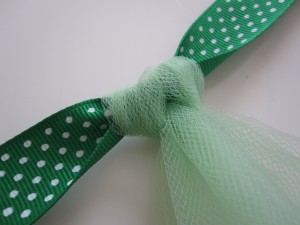
  4. Then I folded the tulle 4, made a loop around the waistband ribbon, pulled it through and tightened. At the bottom you will see a loop , just snip it. 
  5. Keep going after 9 I popped on a contrasting ribbon in gold. These were only one arms length and I added it on the same way.
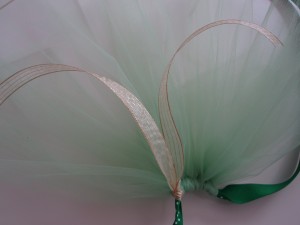
  6. Once all the tulle is on ( test it on your child a few times) make a spot in the front middle and using the same ribbon as the waistband is made from tie a bow on. This gives the illusion that the tutu is tied in the front but stops your child from being able to untie it themselves.
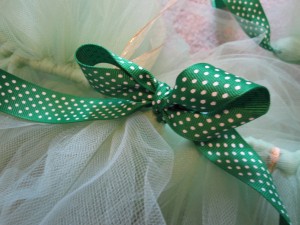
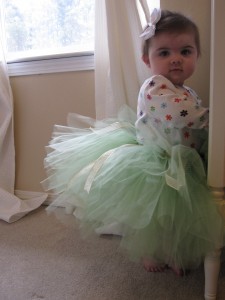
  7. Tie it on and take pictures 😉 I am saving this for when she is a little older although she had fun practicing pulling up in it.
Filed Under: Fairy, Preschool Crafts, Pretend Play, Princess, Tutu | 44 Comments

Like this post? Share it with a friend!

Become an Email Subscriber

Sign up above and receive all new No Time for Flashcards posts directly in your email inbox.

You may also like these posts

Next Post: Make Green Food For St.Patrick’s Day
Previous Post: Shape Sensory Bin Activity

44 Comments

  1. melissa says

    March 16, 2011 at 3:17 am

    LOVE it! this would be a fun thing for my four year old to make herself. maybe as a gift for friends!! fun idea!
    thanks for sharing

    to melissa" aria-label='reply to this comment to melissa'>reply to this comment
  2. Sandy says

    March 16, 2011 at 6:56 am

    I love this! I really need to make some for my girls!

    to Sandy" aria-label='reply to this comment to Sandy'>reply to this comment
  3. Jenae @ I Can Teach My Child says

    March 16, 2011 at 7:23 am

    Oh…how I would LOVE to have a little girl right now! 🙂

    to Jenae @ I Can Teach My Child" aria-label='reply to this comment to Jenae @ I Can Teach My Child'>reply to this comment
  4. Rachel says

    March 16, 2011 at 7:47 am

    I love this! I appreciate anything that has a no-sew tag and this is so cute!

    to Rachel" aria-label='reply to this comment to Rachel'>reply to this comment
  5. Juli says

    March 16, 2011 at 2:15 pm

    Love this! I’ve made a tutu before in the way you’re describing but bought it buy the yard and cut it. The roll of 6″ tulle is way easier!!

    to Juli" aria-label='reply to this comment to Juli'>reply to this comment
  6. butterfly wishes and wonderland dreams says

    March 16, 2011 at 5:07 pm

    Cute!!! she is a doll!

    to butterfly wishes and wonderland dreams" aria-label='reply to this comment to butterfly wishes and wonderland dreams'>reply to this comment
  7. Catherine says

    March 17, 2011 at 3:36 pm

    This is brilliant!:-) Will be making one of these for my little girl. Thanks for sharing.

    to Catherine" aria-label='reply to this comment to Catherine'>reply to this comment
  8. angie says

    March 17, 2011 at 10:27 pm

    Wow what a fun and simple project to do with my girls! Thanks this is great!

    to angie" aria-label='reply to this comment to angie'>reply to this comment
  9. Zoie @ TouchstoneZ says

    March 19, 2011 at 12:28 am

    My 4.5yo and 2.5yo sons have been begging me for tutus. Now I can no longer say I don’t know how. I’m off to find tulle and Star Wars-ish ribbons tomorrow!

    to Zoie @ TouchstoneZ" aria-label='reply to this comment to Zoie @ TouchstoneZ'>reply to this comment
  10. April says

    May 18, 2012 at 10:56 pm

    When you folded the tulle did you just fold it in half and then in half again? Thats the only part I didn’t understand these are so cute!

    to April" aria-label='reply to this comment to April'>reply to this comment
    • admin says

      May 20, 2012 at 7:44 am

      Yes – I folded it once along my arm to measure then folded it again before tying it on.

      to admin" aria-label='reply to this comment to admin'>reply to this comment
  11. Jen says

    July 26, 2012 at 12:30 pm

    To me, the directions were not clear? Need more pics and description please!

    to Jen" aria-label='reply to this comment to Jen'>reply to this comment
    • admin says

      July 26, 2012 at 11:40 pm

      What part is unclear, I’d be happy to explain further!

      to admin" aria-label='reply to this comment to admin'>reply to this comment
  12. Maz says

    August 16, 2012 at 11:10 pm

    Just tried making as favors for my daughters 1st birthday… Turned out so pretty and was easy!

    to Maz" aria-label='reply to this comment to Maz'>reply to this comment
  13. Maz says

    August 16, 2012 at 11:10 pm

    Just tried making as favors for my daughters 1st birthday… Turned out so pretty and was easy!

    to Maz" aria-label='reply to this comment to Maz'>reply to this comment
    • admin says

      August 17, 2012 at 8:19 am

      Yay! Excited we could be a part of something so special – hope her birthday is wonderful!

      to admin" aria-label='reply to this comment to admin'>reply to this comment
  14. Jessica says

    March 5, 2013 at 9:41 pm

    I’m making this for my daughter’s first birthday in a few weeks and I wasn’t sure what you did with the ribbon to tie it on. I know you made a fake bow to put in the front so she couldn’t untie it, but how/where did you put the actual ribbon? Did you just make another “real” bow in the back? Sorry if this is such a dumb question!

    to Jessica" aria-label='reply to this comment to Jessica'>reply to this comment
    • admin says

      March 5, 2013 at 9:48 pm

      Not a dumb question at all. Yes you will have another real bow at the back.

      to admin" aria-label='reply to this comment to admin'>reply to this comment
      • Jessica says

        March 5, 2013 at 10:03 pm

        thanks!

        to Jessica" aria-label='reply to this comment to Jessica'>reply to this comment
  15. Ashley says

    April 30, 2013 at 9:40 pm

    I just finished making 20 tutus for kids and adults( Race for the Cure costumes) this was solo easy and much cheaper then buying them at the store. The only thing diffrent I did was use elastic instead of ribbon for the waist!!! Thank you for posting this.. I will never buy a tutu from a store again!! Hand made is the way to go

    to Ashley" aria-label='reply to this comment to Ashley'>reply to this comment
    • Allison McDonald says

      April 30, 2013 at 10:25 pm

      This comment is so rad. I am so happy to help you and hope that you all have a great race.

      to Allison McDonald" aria-label='reply to this comment to Allison McDonald'>reply to this comment
  16. Susy Perizzolo says

    July 19, 2013 at 6:03 am

    OMG! Thank you for post this tutorial. It was a breeze to make and SO quick to make. My little princess will love it when she wakes up in the morning. Thanks again.

    to Susy Perizzolo" aria-label='reply to this comment to Susy Perizzolo'>reply to this comment
  17. Christie says

    July 19, 2013 at 3:40 pm

    Am I reading it right u tied on 4 pieces at one time ?

    to Christie" aria-label='reply to this comment to Christie'>reply to this comment
    • Allison McDonald says

      July 19, 2013 at 4:10 pm

      It’s two pieces folded in half so there are 4 ends. Does that make sense?

      to Allison McDonald" aria-label='reply to this comment to Allison McDonald'>reply to this comment
  18. Jessica Jones says

    September 5, 2013 at 10:38 am

    I love this! I’m making one for my daughter for her first birthday in a few weeks. Got a question though: what is the gold ribbon for exactly? And if I wanted to use three different colors (pink ombre) how would you recommend doing it?

    to Jessica Jones" aria-label='reply to this comment to Jessica Jones'>reply to this comment
    • Allison McDonald says

      September 5, 2013 at 4:43 pm

      If you want a ombre effect I would layer three colors making sure that they are folded on the same color (if you just fold it in half you will get stripes )and then loop it through. email me if this doesn’t make sense and I will see if I can send you photos to help!

      to Allison McDonald" aria-label='reply to this comment to Allison McDonald'>reply to this comment
      • Hannah says

        January 11, 2014 at 11:32 pm

        I too was thinking favors fit my daughters birthday. Love the ombre, but didn’t understand your description…

        to Hannah" aria-label='reply to this comment to Hannah'>reply to this comment
  19. maryann says

    June 27, 2014 at 4:06 pm

    I made one for my daughter’s 4th birthday. She does ballet and loves tu-tu’s so I an super excited and can’t wait to give it her. She will love it! Such a great and easy fun project. I will never buy her a tu-tu again…. Unless of course for her recitals! Thanks for posting this!!

    to maryann" aria-label='reply to this comment to maryann'>reply to this comment
    • Allison McDonald says

      June 27, 2014 at 4:59 pm

      You are welcome! My daughter still wears this one 3 years later… benefit of being a big baby I guess 🙂

      to Allison McDonald" aria-label='reply to this comment to Allison McDonald'>reply to this comment
  20. Karren says

    September 25, 2014 at 10:38 am

    Hi, thank you for posting, this is fantastic!! 🙂 I’m excited to have a go at making one for my daughters first birthday… Just wondering how many yards approx did you use? Just want to know as I’m pricing up ordering it and want to make sure I order enough 🙂 Tia

    to Karren" aria-label='reply to this comment to Karren'>reply to this comment
    • Allison McDonald says

      September 25, 2014 at 4:54 pm

      Oh gosh I will have to dig the tutu out. I think the spool was 50 yards but not wide.

      to Allison McDonald" aria-label='reply to this comment to Allison McDonald'>reply to this comment
  21. Theresa says

    October 15, 2014 at 10:30 pm

    Thanks for sharing this ! I plan on trying this out really soon , and your daughter is super adorable 🙂

    to Theresa" aria-label='reply to this comment to Theresa'>reply to this comment
  22. BB Crafts says

    August 30, 2016 at 6:03 am

    Wow!! This is awesome and will try to very soon!

    to BB Crafts" aria-label='reply to this comment to BB Crafts'>reply to this comment
  23. Adam Jones says

    July 21, 2017 at 6:18 am

    I love this! Thank you for post this…..

    to Adam Jones" aria-label='reply to this comment to Adam Jones'>reply to this comment
  24. Robert says

    September 18, 2020 at 4:12 am

    Very Helpful and Informative post.

    to Robert" aria-label='reply to this comment to Robert'>reply to this comment

Trackbacks

  1. Celebrate! | No Time For Flash Cards says:
    February 18, 2012 at 11:11 pm

    […] Voter Flag – Play It’s Their Job- Cheerio Bracelet – Texture Board – No Sew Tutu -DIY Batman Mask- Playdough Printing- Vet Clinic Pretend Play – Paper Roll Flute  -  DIY […]

    to Celebrate! | No Time For Flash Cards" aria-label='reply to this comment to Celebrate! | No Time For Flash Cards'>reply to this comment
  2. how to make beautiful, no-sew fairy skirts | teach mama says:
    March 27, 2012 at 1:51 pm

    […] leggings underneath, of course. . . ) I remembered my pal Allie sharing the how-to’s of a Baby Dress No-Sew Tutu, so I ran back to her post and got the basics.  Though her little sweets was teeny when she wore […]

    to how to make beautiful, no-sew fairy skirts | teach mama" aria-label='reply to this comment to how to make beautiful, no-sew fairy skirts | teach mama'>reply to this comment
  3. A Carnevale...ogni costume vale! | says:
    February 1, 2014 at 4:06 pm

    […] DiY Tutù […]

    to A Carnevale...ogni costume vale! |" aria-label='reply to this comment to A Carnevale...ogni costume vale! |'>reply to this comment
  4. Books Plus! Literacy Inspired Gifts for Kids of All Ages | Not Just Cute says:
    November 26, 2014 at 3:08 am

    […] a recommendation!  I wrote about it way back here.  Purchase a tutu or follow this tutorial from No Time for Flashcards for a No-Sew Dress Up Tutu (the tutorial is for a toddler-sized tutu, but could easily be […]

    to Books Plus! Literacy Inspired Gifts for Kids of All Ages | Not Just Cute" aria-label='reply to this comment to Books Plus! Literacy Inspired Gifts for Kids of All Ages | Not Just Cute'>reply to this comment
  5. A Ballerina Birthday Party on a Budget says:
    March 4, 2015 at 1:12 pm

    […] little party guest Joslyn modeled it for us.  Check out this tutorial to make it!  It took me about 20-30 minutes per tutu and cost $3 […]

    to A Ballerina Birthday Party on a Budget" aria-label='reply to this comment to A Ballerina Birthday Party on a Budget'>reply to this comment
  6. 13 No-Sew DIY Halloween Costumes for Babies - Girly Bowtique says:
    October 16, 2015 at 10:47 am

    […] [SOURCE] […]

    to 13 No-Sew DIY Halloween Costumes for Babies - Girly Bowtique" aria-label='reply to this comment to 13 No-Sew DIY Halloween Costumes for Babies - Girly Bowtique'>reply to this comment
  7. 7 Adorable (and Easy) DIY Baby Halloween Costumes - nominivans.com says:
    October 25, 2015 at 7:13 am

    […] on etsy (I’ve ordered from this shop before and am super pleased) or make yourself (I like this easy tutorial and have made them this way many times). Add halo headband, which you can find online or buy from […]

    to 7 Adorable (and Easy) DIY Baby Halloween Costumes - nominivans.com" aria-label='reply to this comment to 7 Adorable (and Easy) DIY Baby Halloween Costumes - nominivans.com'>reply to this comment
  8. Amfoc Blog says:
    August 9, 2016 at 11:51 pm

    Best Buy Snowflakes Butterfly Bow Tie

    […] Thank you for posting this.. I will never buy a tutu from a store again!! Hand […]

    to Amfoc Blog" aria-label='reply to this comment to Amfoc Blog'>reply to this comment
  9. Books Plus! Literacy Inspired Gifts for Kids of All Ages - Child Psychology Blog says:
    May 18, 2019 at 9:05 pm

    […] a recommendation!  I wrote about it way back here.  Purchase a tutu or follow this tutorial from No Time for Flashcards for a No-Sew Dress Up Tutu (the tutorial is for a toddler-sized tutu, but could easily be […]

    to Books Plus! Literacy Inspired Gifts for Kids of All Ages - Child Psychology Blog" aria-label='reply to this comment to Books Plus! Literacy Inspired Gifts for Kids of All Ages - Child Psychology Blog'>reply to this comment

Leave a Comment Cancel reply

Your email address will not be published. Required fields are marked *

This site uses Akismet to reduce spam. Learn how your comment data is processed.

FREE Summer Reading Program

Now In Paperback!

Buy NOW

Search For Activities

All Activities

Become an Email Subscriber

Sign up above and receive all new No Time for Flash Cards posts directly in your email inbox.

  • Facebook
  • Twitter
  • Instagram
  • Pinterest
  • Bloglovin

Copyright © 2008-2022 • No Time For Flash Cards - ACM Media LLC • Site Design by Emily White Designs