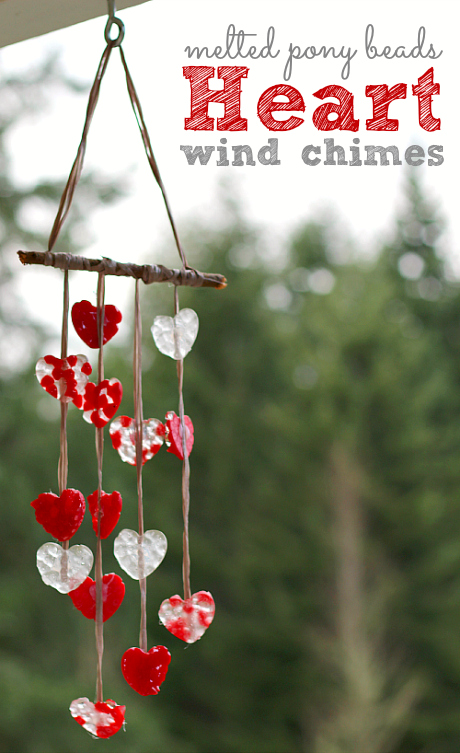
This is not a hands off kind of craft. My three year old did the first half with no help and I did the 2nd half of this melted bead craft all by myself. I have been wanting to try melting pony beads since I saw my friend Jean’s post on Artful Parent ages ago. My original idea was to make heart pendants for my daughter’s preschool class. That was a giant craft fail because of the way the beads melted. You could still try that but I didn’t want all these hearts to go to waste so we turned them into heart wind chimes for Valentine’s day.
Gather your materials. You will need plastic beads – we used red pony beads and clear tri-beads. A heart shaped silicone treat pan, ribbon or string, a hot glue gun, scissors, and a stick. 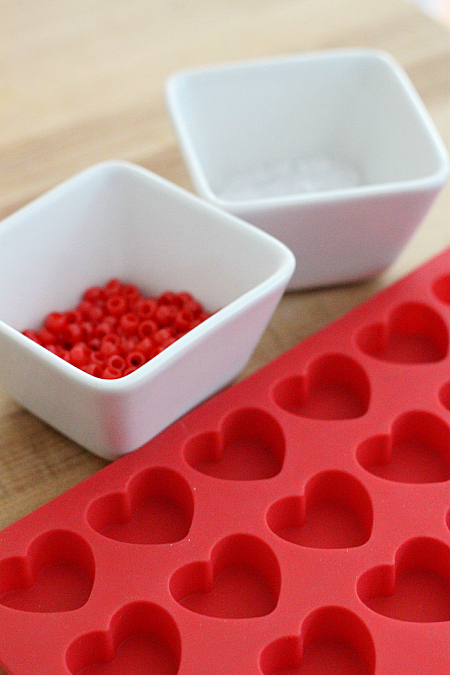
Start by filling your pan with beads. My daughter filled some with all clear, some all red and some a mix. 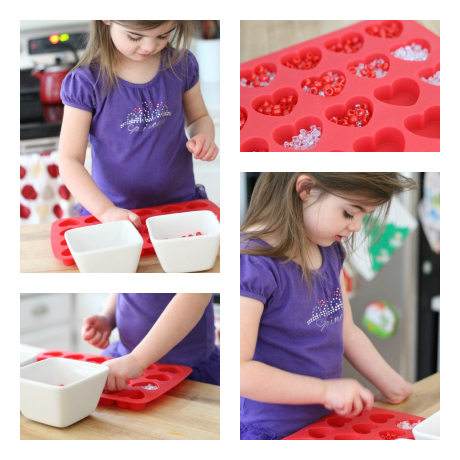 Filling the hearts was fun for her because she did it independently but she was also working on skills like visual perceptual and fine motor skills as she grabbed the beads and managed to fill but not overfill the cups.
Once all the beads were in we were ready to melt, I followed Jean’s instructions for the melting the beads and popped the pan in the oven. She checked on it a few times.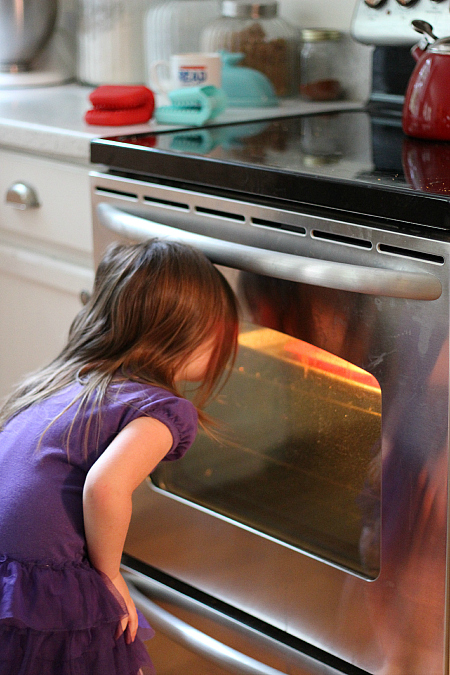 There were no fumes while melting but when I opened the oven door they were very strong. I was expecting this so I had my windows wide open and the fan on, still it was strong. If you are sensitive to fumes you could try it on your grill or maybe try a different valentine’s craft. I don’t want anyone surprised by the fumes but do know that they were gone 20 minutes later when my son with the super nose came in and didn’t notice a thing.
When they cooled I popped them out of the pan and immediately noticed that the beads that were against the side melted in a sharp point. Not exactly kid safe for Valentine’s day favors for a bunch of three year old children. 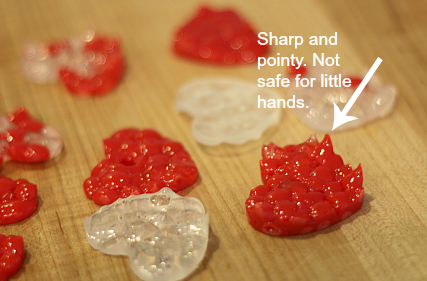 I had the hearts in my hand and noticed they made a cool clinking sound and decided that was it, these could make great wind chimes! I grabbed my glue gun, some ribbon and a stick from my garden.
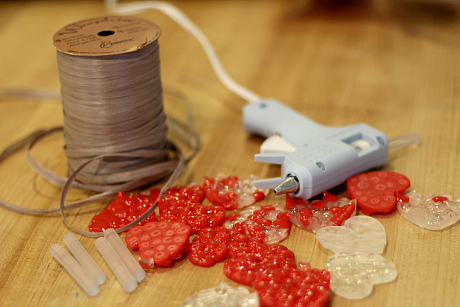
To make the chimes – glue the hearts on the ribbon. I tried to get them staggered on the different ribbons. I did 4 ribbons total with 3 or 4 hearts on them. 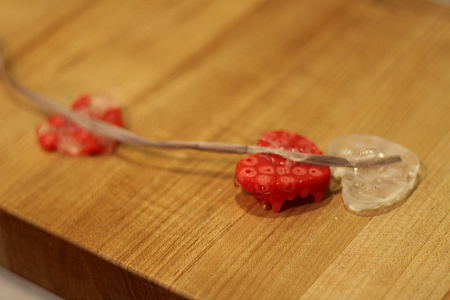
Next I wrap the ribbon ends around the stick gluing it down with hot glue. 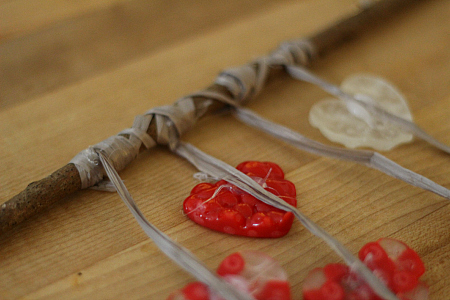
Finally tie on a final piece to each end of the stick to hang. 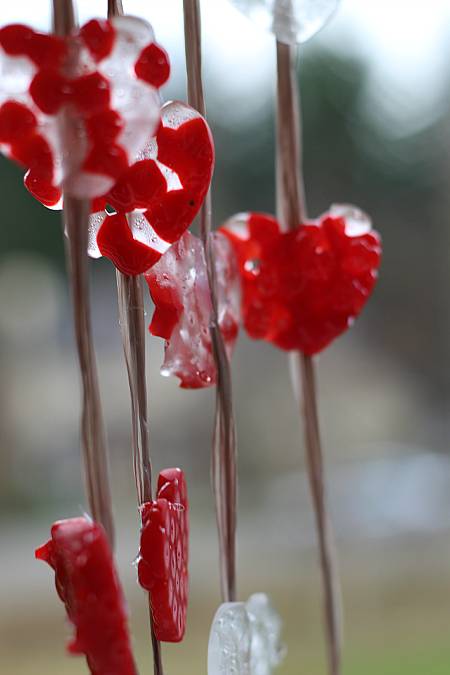
I love how they look and bring a little love to our front porch and my daughter loves checking on it when she can hear it clink in wind. 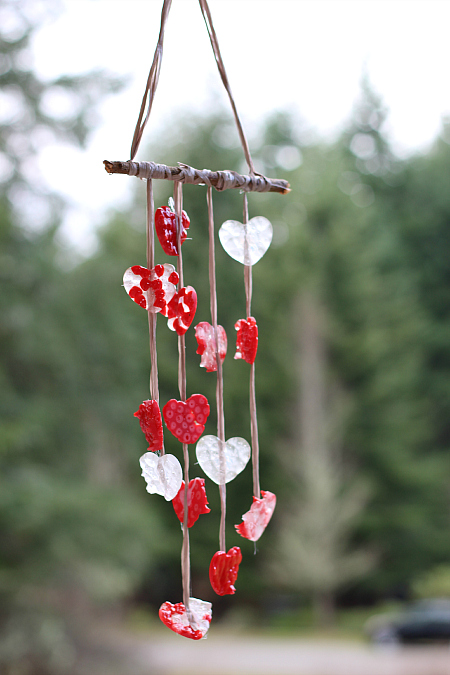
Have you ever had a craft fail turn out in the end?


Amy says
I love this idea what a great valentine craft to do with the kids
Jan says
One of our PBS kids newsletters last year had melted pony bead bowls in it. We made them for grandparent gifts for Christmas. Super easy, super smelly, and super pointy! I know just what you mean by the sharp pointy edges. We love them but do handle them with care due to the edges and they turned out great as colorful gifts. We dealt with the fumes longer than 20min but our house doesn’t open up to air out very well and it was too frigid out anyway. 🙂 I love how you turned this around to make it work! Btw, my kids have made several of the pink and red collage hearts and have extended the idea to add embellishments. We now have several varieties of valentines to hand out and I’m not sure which they’ll choose for their classroom. Love your blog!
Allison McDonald says
I really debated posting because of the fumes , they can’t be healthy. That was part of the reason I didn’t want to redo it and decided to make the best of the pointy hearts.
Glad you like the blog – I hope you keep coming back and enjoying it!
tammy says
If you have an old toaster oven, you can use that and bake them outside. Also you can place a metal but where you want to put a string through for hanging.
tammy says
That should be metal nut! (As in nuts and bolts)
Darlene says
Using a nut would be good we made xmas ornaments with peppermint candy crushed in cookie cutters this year. But needed a good way to hang without using a drill to put holes in. Also this was made with neices and nephews ages 3 to 11 great time
CG says
Great craft! I had my 4yr old help sand the sharp edges off (after a rough sand by mom to get the really pokey parts). She thought it was pretty cool. Love the bolt idea!!!
Gina says
I made hearts one year out of old colors that was broke I used the same thing as u did expect I use my grand daughter old school crayons I put them in the treat bags I made for the class and the kids loved them they colored with them
Karen says
That is a terrific idea. Or you could drill a small hole after they have cooled. If using glue on the ribbons, I would use E6000 in the tube.
It comes in clear, white and black. I tell you this because sometimes I am a grabber. Having said that the black worked so well on the sole of my husbands favorite shoes. I think he has forgotten to look for new ones.
Jara says
Awesome idea!
Heather asher says
Did you reuse the heart silicone for baking after words if so how did you clean it. Loving this idea
Allison McDonald says
Dishwasher safe 🙂
Diane Hueschen says
What temperature did you use and for how long?
Allison McDonald says
200-220 and watch – as soon as they are melting together take them out.
Linda says
I have an old toaster oven designated just for my crafts – baking clay. I use this outside on the patio. That way the fumes aren’t in the house.
Allison McDonald says
So smart and exactly how I’d do it if I made this again!
Sam says
You could try hammering down pointy beads before they totally harden.
Allison McDonald says
I tried with a few but was too late for the others. Good solution though.
Karen says
that may work great and I like the sanding idea .as well. after doing either of these a little more baking time in the toaster oven outside might be just the ticket for a smoother shiny heart after the pounding and filling or sanding.
I am really enjoying your block. Please pat yourself on the back You have an a wonderful blog. I love it!
School Time Snippets says
I hadn’t thought of just dumping the beads into the mold!! We *very* meticulously arranged ours when we made one last summer! Oyi!! That was a job in itself!! Love how yours turned out! My son has been wanting to make one again ever since… I just haven’t wanted to deal with the smell again!
jaine (jane) says
Im going to make mine with melted wax and just before they set I will add the string, it will also smell beautiful
Rita O'Gorman says
Love this idea. I do poly clay and the melting of plastic in an oven you use to cook with just isn’t safe. The chemicals you smell are sticking to the surface of you oven and may contaminate the food you back afterwards.
Dawno says
Is it possible to melt the beads, allow them to cool, flip them over in the pan and melt again to try and get rid of the pointy parts? Has anyone tried this?
Allison McDonald says
I bet it would although the clear beads may get golden if you bake them too long.
Vania says
Love these. Made them with my kids today and they just wanted to keep making more. I put them outside on the grill, only took about 10 minutes!
Nayeli says
This is such a cute idea! I used to be in school for occupational therapy and for our therapeutic media we did crafts like this. For one of the presentations, one group melted beads like these using an iron. We would put the beads in an already heart shaped mold. Its plastic and you just place the beads in each spot. I forgot what they are called but they sell the packs at the dollar store or walmart. Once the beads were placed in the mold we put a paper that came with the package and put the iron on top to melt the beads. But if someone does this the way you did it maybe try keeping an eye on them when they are cooling and if you see spikes push them down with a toothpick before it hardens?
Allison McDonald says
Those are perler beads and I love them!
Shari Kalous says
Might I suggest lightly spraying the pan with pam? Just a very light coat shouldnt effect the beads melting. However, I am going to try this but have to get a mold first! Ive seent his done with metal cookie cutters as well and they used either spray oil or flour to keep them from sticking. Been a long time and cant find it now so I know it was one or the other. Keep trying and If I find a solution I will let you know!
Gabrielle says
This is a wonderful craft that I would love to do with my son and the kids I babysit. I am wondering where I can get a heart silicone mold tray?!
Allison McDonald says
Walmart has these exact ones again this year!
Simpson Strong Tie Restraint Strap says
Hi friends, its wonderful paragraph concerning tutforingand completely explained, keep it up all the time.
Peggy says
I have been mellting pony beads in a toaster oven which is in the garage. Is there a way to get the smell out so I can use it again?
Allison McDonald says
The smell was only temporary for me but I used a large oven, I wonder if toasting some old bread a few times would absorb the smell a little, I am totally just brainstorming this, it’s not based on any facts or experience.
Monica says
Melted beads give off poisonous gas linked to cancer. Do you think this cute project is worth the health hazard you are exposing yourself and students or kids to?
http://www.carahealth.com/health-conditions-a-to-z/reproductive-system/breast-cancer/228-the-danger-of-burning-plastic.html
Allison McDonald says
Thanks for sharing this with us, I will look into this more.
Carrie says
I used cooking spray and it burned. I’m going to try again without.
Allison McDonald says
no way – I have never heard that! I’m so sorry, I would lower our temp too. I hope your next try works.
Karen Fellers says
I was talking with a friend who is a girl scout leader and she asked me if I thought the mold could be reused for anything else after the hearts are made?
Allison McDonald says
Not for food – for crafts yes!
Megan Saxbury says
Very pretty. I have done ornaments a few times with melted pony beads. From what I see in picture you filled to much. Use less. Mine were very smooth. I did inside of salt dough form. Make salt dough. Cut out circles and use cookie cutter to makeshape. Fill. Make sure oven is hot 450 degs. They will melt smooth. You can use your red heart form to tho if it can be that hot. I carefully broke off the salt dough after. Now a hole. Easy! when you pull from oven use a nail and make a hole well its melty still. Hope this helps. My kid Is 7 in 2 days. And we made our first one when she was 3. She gas played with them and hung them in the window till the sun took so much color we have made more.