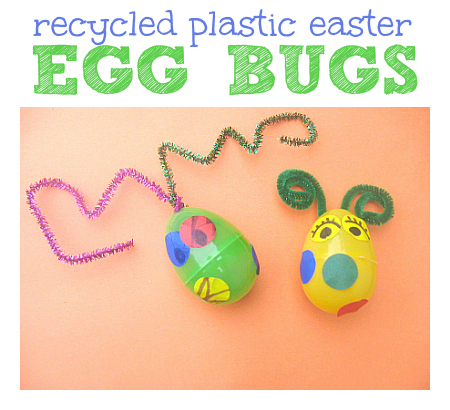
 Recycle your plastic eggs after the chocolate and jelly beans have been consumed and make something fun! Fast and fun, these plastic egg crafts let your kids create while they learn.
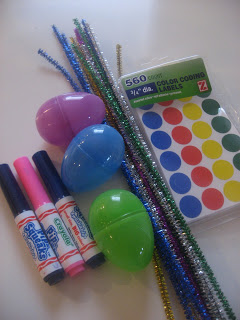
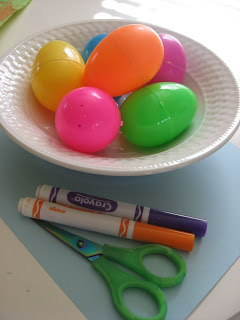
- Gather your materials. You will need some plastic eggs that have pre-made holes in them ( most do), some pipe cleaners, label stickers, and markers.
- Start by drawing on your label stickers (they are matte so you can color them and it will stick). I was shocked by how much my son liked this step, glad I added it in.
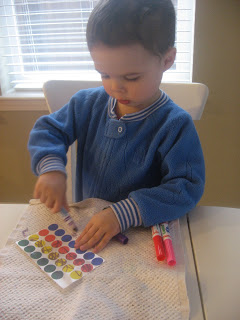
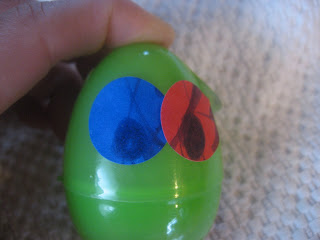
- Next, stick them onto the egg.
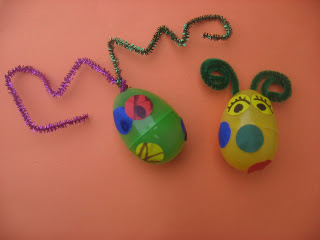
- Use two labels to act as eyes and draw some eyes on them with a marker!
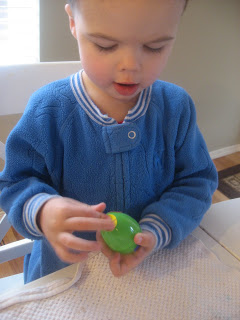
- Pick out a pipe cleaner, or 2 if you are a toddler and like to always say “Two?” whenever anything is offered. Thread them through the holes.


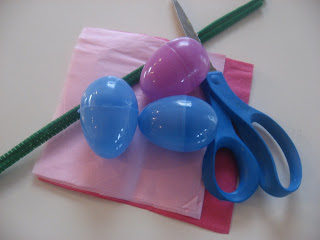
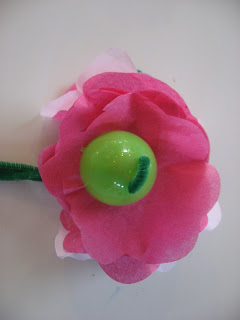
Egg Blossoms!

- Gather your materials. You will need some tissue paper, pipe cleaners, scissors, and eggs.
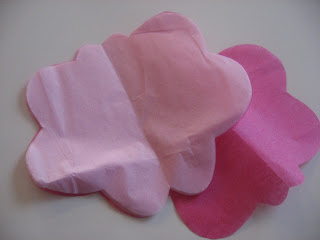
- Cut your tissue paper into a flower shape. I used multiple layers for each egg.
- Break the egg into 2 pieces if it has a connector, then thread the bottom piece onto the pipe cleaner.
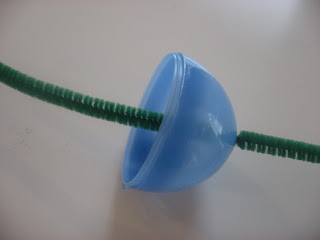
- Add the tissue paper by making a small hole in the middle and threading it on.
- Add the top piece.
 Thread your pipe cleaner through and then gently tug. Some eggs have one hole only. In this case, make a little knot and tug. If there are 2 holes, simply thread it back in.


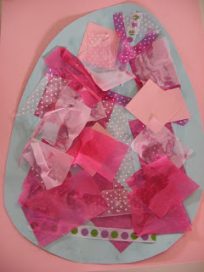
Polka Dot Discovery
 I have done this activity for years and never once called the eggs Easter eggs. They were polka dots with surprises inside. Obviously, if you celebrate Easter there is no reason to call them anything else but if you don’t celebrate Easter you can still jump on the polka dot bandwagon and use them to have fun learning.
- Gather your materials. You will need some plastic eggs that open with room to hide things inside, you can also use small gift boxes. Some paper, a marker, some scissors and basket or bag.
- The great thing about this activity is that it’s versatile. If you are learning about shapes you can pop shapes in the eggs. If you are doing letters, you stuff them with letters etc… So this next step is where you decide what to stuff them with and using a marker and paper, make the surprises.
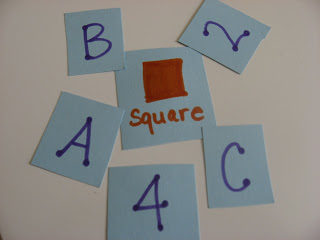
- Stuff the eggs and either hide them for a hunt or place them in a basket for your child to choose from.
- When your child finds the egg, make sure to ask them what color the outside is. Then encourage them to open it up and find what’s inside.
- If your child is a young toddler, you can simply put fun toys in and they will be kept busy finding them. Just opening the eggs are great fine motor skills practice!
- One last note if you have an older sibling who is working on sight words at grade school. You can pop those in some eggs for them too!


For more fun Easter crafts and plastic egg crafts, make sure to follow me on Facebook!
Melodie says
Great ideas! I opted out of the plastic eggs this year because last year, after a few weeks of playing store and kitchen with them the egg halves lost their mates and got broken and all ended up in the garbage. And now it looks like rain so I wish I had bought some. Thanks for the great ideas1
Letters,Numbers and Books says
I did a post about what we did with our easter eggs I can email it to you if you want
Teri says
Thanks for the ideas! Check out the easter egg ideas on my blog, too!
http://pennstateprincess.blogspot.com/2008/03/works-for-me-wednesday-easter.html
Siayla says
Love the flower idea especially! I’ve made lots of wet felted eggs this year but we still use some plastic ones. The spring flowers are great for followup after Easter! Thanks for all your great ideas. I just posted a matching game too that Sierra had lots of fun with this am.
http://siayla.blogspot.com/2009/04/easy-easter-matching-game.html
Enjoy and happy easter!
Charlee says
You can also use it as a number activity you take one half of the egg and write the number and the corosponding number of dots on the bottom and its a matching game!
Patti says
I never throw them away, but I don’t do anything with them, either! I finally convinced my in-laws not to buy any eggs at Easter because I reuse them year to year.
One of our field students just showed me a neat trick we’ll use tomorrow at home: If you squeeze the larger half of the egg, the smaller side will pop off. I think I’ll set up targets though so the kids don’t shoot each other.
Katy says
Aww! These are great ideas! My kids love playing with the plastic eggs too, but these ideas will be great for getting some extra mileage out of them. 🙂
Tanya says
I’m laughing so hard because I thought my toddler was the only one that demanded 2 of everything! 🙂 Love these ideas. I’m totally calling these polkadots from now on.
Allie says
Just a quick update – I teach Sunday school and today we had a small egg hunt then made these with our eggs, the kids LOVED it. I always like testing things on the older kids!
Tonya says
I love these ideas! We made something similar to the flowers but instead of using tissue paper, we used coffee filters we had dipped in our Easter Egg dye and allowed to dry. They had a tie-dyed look and allowed us to incorporate color mixing learning into the activity. You could do the same thing anytime using food coloring too!
Damselfly says
Great ideas, thank you!
KJ says
I love it! I posted a link to this activity on my blog tonight: http://onetightwadmama.blogspot.com/2009/04/blog-spotlight_17.html
Thanks for such great ideas!
Phalen says
These are So cool