
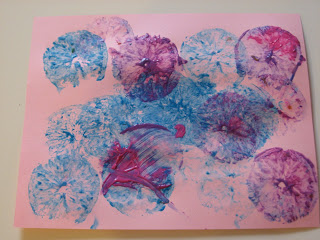
I was reading Teaching Tiny Tots the other day and found this great idea for orange prints. I had to do it, it fit perfectly with our fruit theme and just look at how awesome the prints are. To see the inspiration for this post head over to Teaching Tiny Tots ( edited 2012 the blog is no longer active)
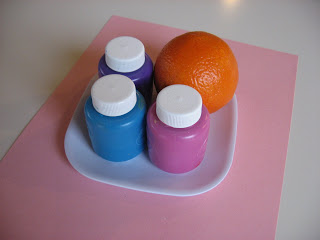
- Gather your materials. You will need some heavy paper ( we used card stock), some paint, an orange and a plate.
- Cut your orange in half.
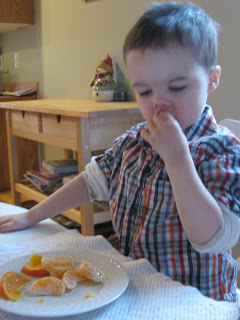
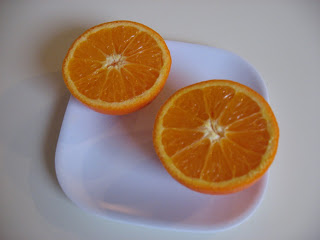 Reserve one half for a taste test after art time. I blotted ours a few times because it was really extra juicy.
 - Dip in the paint.
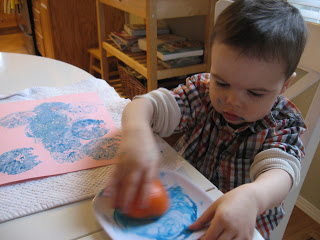
- Print !
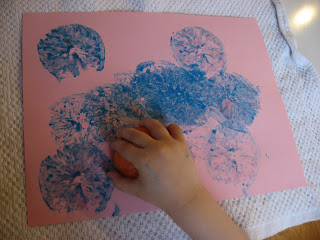
- Add more colors if you want, or make a beautiful monochromatic print, no matter what it will look awesome !
- Have a tasty snack – after the project.


Childrens Arts Projects says
Its a good art project for kids. They enjoy a lot in such activities.
Georgia
teachingtinytots says
great job!!! i love orange prints i think i love them more the apple prints!!!
Allie says
Shannon I want to try lemons and limes next, I agree it’s cooler than apple prints!
Georgia- glad you like it. I have always enjoyed using food for art, and kids do love it!
teachingtinytots says
yep we have lemons and limes and grapefruits sitting out right now drying for more prints!!!!
Lisa says
I love this craft (and this entire website). I find it best to just use a little bit of paint. I’m going to make our Christmas wrapping paper from this print this year.
Amanda says
I can’t remember where I originally read this idea, but I use it in my classroom all the time: Put your paint on a tray, then press a folded paper towel into the paint. It will keep your prints looking more clear as opposed to extra-gloppy.