
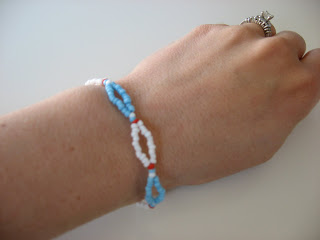
I made these all the time as a preteen and with the school year coming to a close I thought I better share some more “big kid” projects for all the older kids of my regular readers. Beading offers a great lesson in patience, fine motor control and patterning. This is easy to do but is adorable, I have been wearing this bracelet around town .
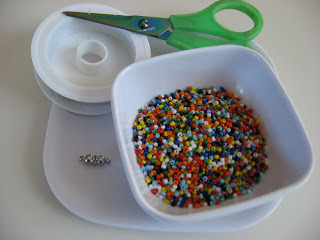
- Gather your materials. You will need some seed beads, beading wire, a magnetic or latch clasp, and a small plate or am old yogurt lid works great.
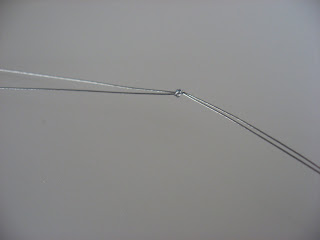
- Start by cutting off two pieces of wire, about 2 feet long each. Tie together.
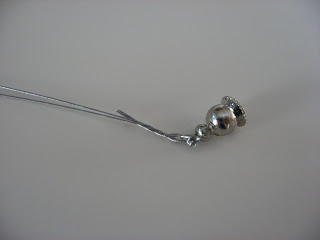
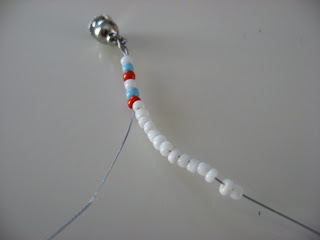
- Next secure that to one clasp. I don’t have a set way of doing this, I just tie it on- tug and make a few more knots if it’s loose. trim the ends but not too short because we will be hiding them in the first few beads.
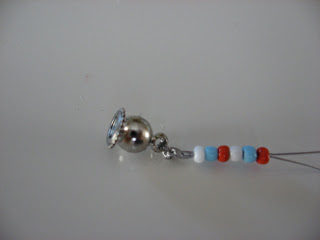
- Start adding beads to both strings- so one bead goes over both wires. Carefully thread the end bits of the wires through as well. Repeat with as many beads as needed to cover the end bits.
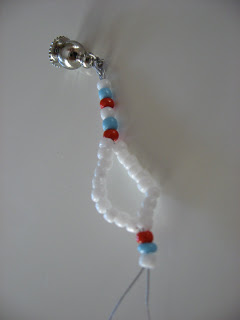
- String 8-12 beads on one wire.
- Repeat on the other wire
- Now thread both wires through 1 bead. This will make the loop.
- Continue until you have enough for a full bracelet. I re did mine 4 times before I liked my pattern, make sure you let your child know that the best part of making something themselves is that there is no right way, if they don’t like the pattern, start again.
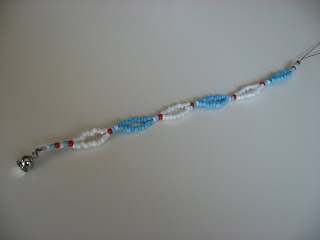
- Tie on your other clasp and you are good to go. I tucked the wires into the last few beads , so if you want to do that you need to keep the ends a little long so you can handle them.


Naptime Books!I am looking for some guest reviewers for chapter books. If your school age child and you would like to review a book you’ve read please email me with the title, the author , your review , first name and age. The review should be a paragraph or two long .I will be doing 2-3 of these special posts throughout the summer.


taylors says
To finish the bracelet a little stronger all you need is some crimp beads and a crimping tool…way easy to use! An dreally not that expensive!