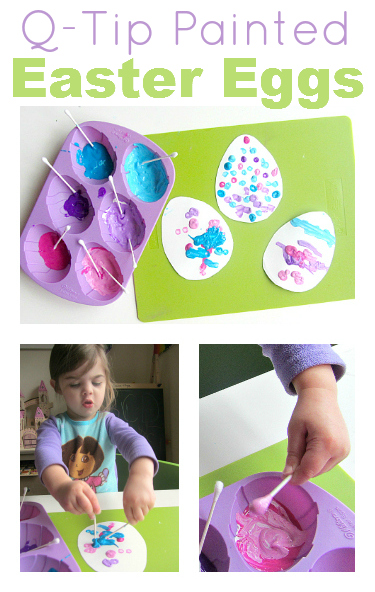
 Time is not in abundance here. It seems like after getting kids where they need to be, food in our fridge, clean clothes and floors, there is not as much time as I thought there would be. That is why I love activities like this painted Easter eggs craft that work on developing a skill like fine or gross motor skills as well as teaches a lesson and gives my daughter free reign on how the craft will look. Most arts and craft projects have some fine motor work but using q-tips amps it up when time is short. Creativity, art lesson, and of course, fine motor. All in about 8 minutes. Toddlers don’t sit long. They aren’t meant to so don’t force them to. Keep things short, sweet, and packed full of learning disguised as play.
How to Make Q-tip Painted Easter Eggs
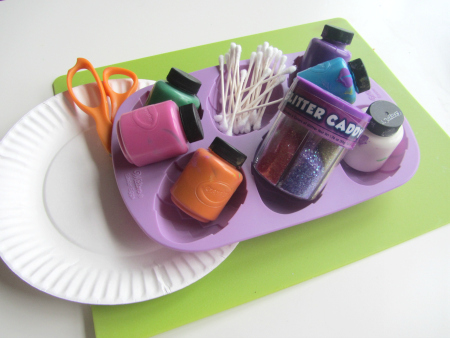
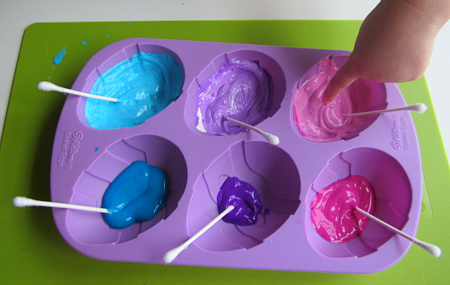
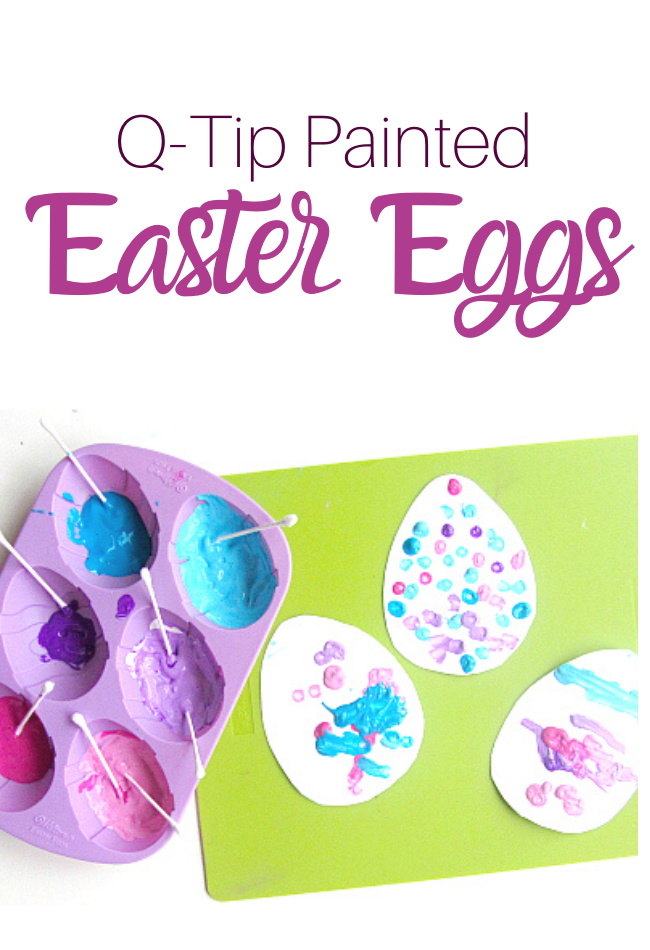
- Before you begin, gather your materials. You will need some sturdy paper (like paper plates), paint (any colors but you must include white), some containers or tray (like an ice cube tray) to mix the paint, and q tips.
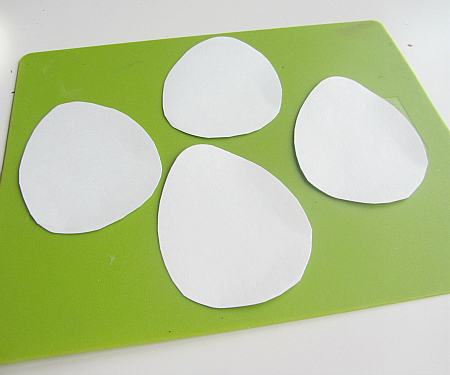
- First, start by cutting out your eggs.
- Next, pour some paint in your tray. Talk about the colors. Add white to each color and have your child mix the paint.
 What happened to the color? This is a basic lesson on tints. As kids learn their colors, the next step is to see the differentiation and results of color mixing. I love adding white to make lighter tints of the same colors. This is especially great with toddlers who insist on only ever using 1-2 of their favorite colors. Since doing this activity late last week, my daughter has been evaluating colors in our house “Dat light gween Mama, not dark gween.” It’s pretty fun to see her put her new knowledge to work.
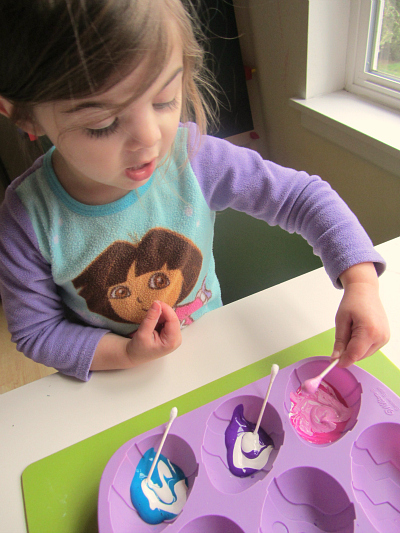
- After all the tints have been mixed, pour a little more of the original color in an adjacent container or slot in the tray. Make note of the difference. Ask your child which tint of each pair they like the best. As you can see she chose light pink.
- Next, it is time to paint.
 This has no desired result other than exploration. Let your child explore how the q-tip makes marks on their egg. They will naturally be holding the q-tip in a pincer grasp and controlling it will be giving their fine motor skills a good work out.
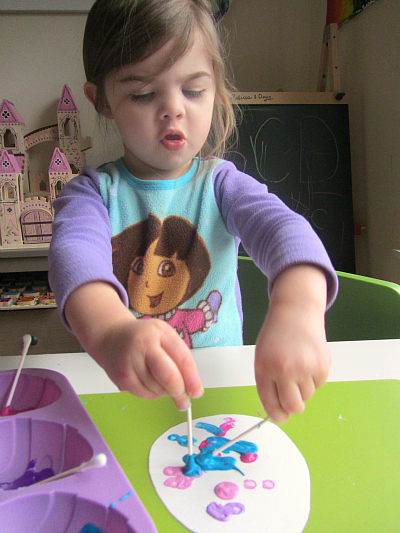
- Next, she explored with dots and stripes.
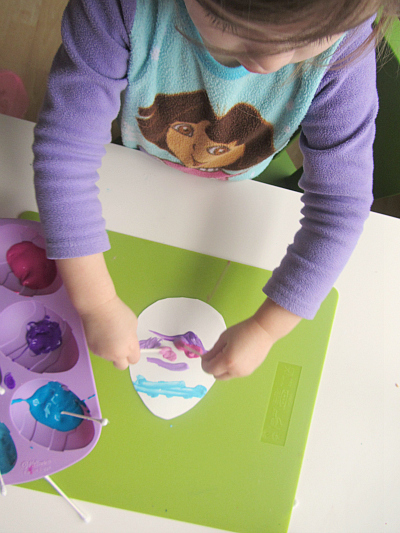
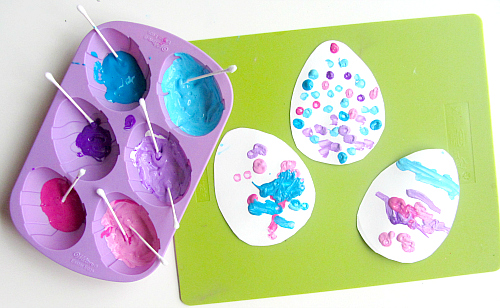
- I started making a polka dot one too and then after she finished her two painted Easter eggs, she joined me in covering mine with dots. Let dry and then if you want, use as little Easter cards for loved ones. As soon as hers were dry, she gave them to her brother. He thankfully was full of praise for her efforts. Kids love giving away their art so if you find yourself drowning in it, start sending it to loved ones who will no doubt love it.
For more about fine motor, check out this Google+ Spring Into Education chat (you might recognize a face or two)
For other fun Easter crafts like these painted Easter eggs, make sure to follow me on Instagram

Georgina @ Craftulate says
I love the idea of QTip painting! So simple!
sarah says
what type of paint do you use? I never feel like I have the right type of paint, thanks for your help and the constant source of great art ideas (especially for those of us like me who are artistically challenged).
Allison McDonald says
I use Crayola Kid Paint 99% of the time. It’s thick and mixes well.
Charlotte says
love this – just set this up for my daughter (33mths). She wavers between months where she’s extremely interested in focused craft activities, and months when it’s the last thing she can seem to manage – we’re in the latter at the mo! She loved the Q tip idea, and the colour mixing, but after one egg of dots somehow managed to return to her favoured palmar grasp and just “scribbled” all the colours together! *sigh* …we shall continue practicing fine motor skills here!
AJ says
Thank you for another good idea! This is our attempt: http://pinterest.com/pin/354165958166370799/
The color mixing was a huge hit, especially the idea of adding more and more white paint. However, my daughter was more interested in painting the eggs solid instead of making designs. Oh well. I used regular drawing paper and it curled when dry. Any suggestions on how to flatten the paper? I was planning to use the eggs for Easter cards.
JessV says
Hi!
I found a link to your blog on Pinterest, and my 3 year old daughter and I did this Easter craft. Thanks for sharing, it was lots of fun!
I did a blog post on it too:
http://jessv83.blogspot.com/2014/04/easter-craft.html
xx
Erin says
Thank you for the idea! My toddler loved doing this activity and I recently wrote about it on my blog. We are fans of Q-tip painting now for the future. 🙂
http://wp.me/p5GVyp-3R
Pencil Sketch says
Your work is very nice. Nowadays this is great to share on the internet. keep it up thanks for sharing with us such nice content.
I have a modern location and site to provide artwork. It has satisfied many consumers all over the world.Visit my Website Pencil Sketch Drawing And learn.
Chloe says
Wow!! Not even someone in pre-k can do that! I’m with !!!
Chloe says
Wow!! Your daughter is amazing (Even though that she doesn’t know how to pronounce words correctly. But that’s okay.)